
As an Amazon Associate, I earn from qualifying purchases. This means I may earn a commission if you purchase through links on this page — at no extra cost to you.
Some rooms need light where no wire exists, and some homes — rentals especially — cannot have wires added at all. No-wire wall lighting solves that problem, but only if you choose by power source, placement, and color temperature rather than by product photo. A sconce that looks perfect online and dies in a week, glows the wrong color, or hangs where it blinds you is not a bargain.
This guide works through the decisions in order: what powers the light, what color it should be, where it goes, and how it mounts without an electrician. Get those four right and no-wire lighting stops looking like a compromise.
Battery vs Plug-In vs Solar: Power Options Compared
Battery-powered lights are the most flexible: they go anywhere, need no outlet, and install with adhesive or a couple of screws. The trade is maintenance — batteries need replacing or recharging, and brightness drops as they drain. Battery lights suit places you use in short bursts: a hallway at night, a reading nook for an hour, a closet. They are a poor choice for a light that burns all evening, every evening, where the battery chore becomes the story.
Plug-in lights trade flexibility for steady power. They are brighter, they never dim with a dying battery, and they suit the lights you actually live with: bedside sconces, picture lights, a living-room accent wall. The trade is the cord — you need an outlet within reach, and the cord route has to look intentional rather than draped. A cord channel painted to match the wall, or a route behind furniture, turns a plug-in from a compromise into a fixture.
Solar lights need direct light to charge, which rules out most indoor walls. They earn their place in sun-facing windows, covered porches, and outdoor walls that get real sun — not in a dark hallway, where they will fade by evening. If a solar light’s charging panel lives in shade, it is not a solar light, it is a dim battery light with extra steps.
Rechargeable lights sit between battery and plug-in: no disposable batteries, but a charging routine. They suit bedside and desk lights you already touch daily, where plugging in to charge is no burden. For a high hallway sconce you need a ladder to reach, rechargeable becomes a chore — choose plug-in or disposable battery there instead.
🛒 Shop This Look:
Pick One Color Temperature and Layer Your Light
Color temperature is the fastest way to make no-wire lighting look either designed or accidental. Warm light (the yellowish glow of a traditional bulb) suits living rooms and bedrooms, where it reads cozy. Cool light (bluish-white) suits task areas like kitchens and desks, where clarity matters. Mixing them in one room — a warm sconce beside a cool strip light — makes the room feel off even when nobody can say why.
Pick one temperature per room and hold it across every no-wire light in that room. If your ceiling light is warm, your sconces should be warm too. Check the packaging for temperature wording rather than guessing from the product photo, and test one light at night before buying a set.
Layering matters as much as temperature. One bright sconce in a dark room creates glare and shadows; three softer sources — a sconce, a strip behind furniture, a small lamp — create even, livable light. No-wire lighting is naturally suited to layering, because you can add sources exactly where the room is dark instead of rewiring the ceiling.
Placement Rules for No-Wire Wall Lighting
Height decides whether a wall light helps or blinds. Sconces beside a bed or sofa sit best with the light source around shoulder height when seated — high enough to spread light, low enough not to glare into eyes. In a hallway, sconces above head height keep the passage clear and the light even. Above art, a picture light sits just above the frame, close enough to wash the art without casting the frame’s shadow across it.
Spacing matters in rows: two sconces flanking a bed, a mirror, or a sofa should sit at equal height and equal distance from the center, or the symmetry reads as a mistake. A single sconce on a long wall looks lost; either commit to a pair or move the light to where it serves a task — beside a chair, over a desk, at a stair turn.
Mirrors double light, which is a gift and a trap. A sconce beside a mirror doubles its glow; a sconce facing a mirror doubles its glare. Place sconces to the sides of mirrors, not opposite them, and test at night before fixing the position permanently.
Stairs and hallways deserve special attention: light the treads and the turns, not just the landings. A dark step is a safety problem, and no-wire lights — motion-sensor strips or small sconces — are often the only practical way to light a stairwell without an electrician.
Choosing by Room
In the bedroom, bedside sconces are the classic no-wire win: they free the nightstand, give each side its own light, and switch off without getting up. Choose dimmable or warm lights here, and keep the switch within arm’s reach of the pillow.
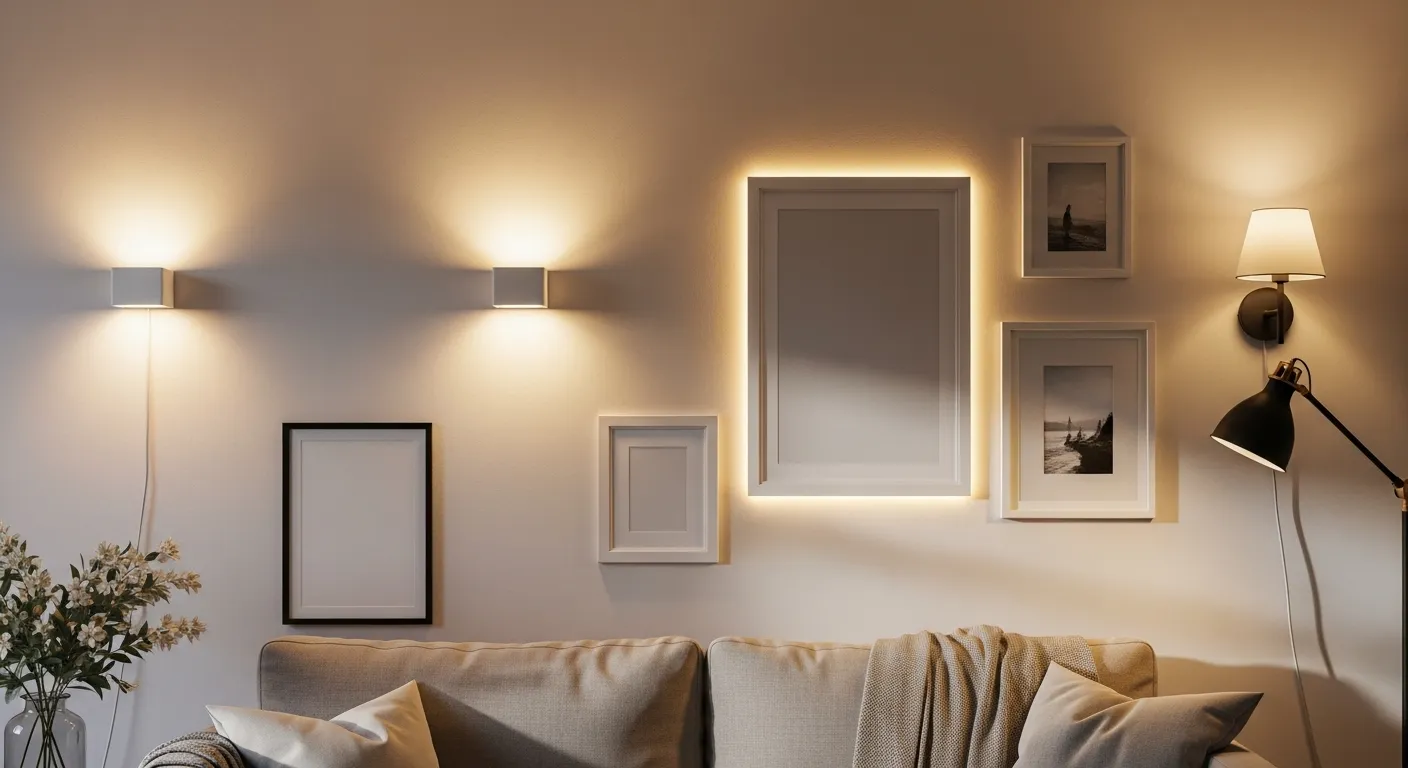
In the living room, no-wire lights work best as accent layers: a sconce washing a textured wall, a strip behind a bookcase, a picture light over art. The ceiling light does the heavy lifting; the wall lights do the atmosphere. Avoid making a single plug-in sconce the room’s only light source — it will glare and leave corners dark.
In the bathroom, placement beats product. Lights beside the mirror, not above it, give even face light without harsh shadows. Keep battery lights out of direct splash zones, and favor plug-in or hardwired-rated options where steam is constant — a battery compartment that corrodes from humidity is a short-lived light.
In the kitchen, under-cabinet strips and small sconces over work zones beat a single bright wall light. Task light where you chop and read recipes matters more than decorative light, and plug-in strips with a cord channel are usually the practical answer.
🛒 Shop This Look:
Renters and Damage-Free Mounting
Renters get the most from no-wire lighting, because it adds real light without touching the wiring. Adhesive mounting handles light sconces and strips on smooth, clean surfaces, within the printed weight rating. Textured paint, dusty plaster, and humid bathroom walls all weaken adhesive — test one mount for a day before trusting it with a heavier fixture.
For heavier sconces, small screws into a stud or a proper wall anchor are worth the two tiny holes — they hold, they remove cleanly, and they beat a fallen light. Photograph the wall before mounting so move-out repair is simple. And check the lease: most allow small fixings, but a quick read now beats a deduction later.
Cord management is the renter’s finishing touch. A plug-in sconce with a visible cord reads as temporary; the same sconce with its cord run along a baseboard, behind furniture, or inside a paintable channel reads as installed. The light is the same — the route is what changes the impression.
Mistakes That Make No-Wire Light Look Cheap
Going all-battery everywhere is the most common mistake — a house full of lights on different battery schedules means something is always dim or dead. Mix power sources by use: plug-in where lights burn nightly, battery where they burn briefly.
Mixing color temperatures in one room is the second. So is hanging lights at eye level where they glare, or facing them at mirrors and screens. And solar lights in shaded spots, plug-in lights with cords draped across walkways, and adhesive mounts overloaded past their rating all turn a good idea into a visible failure.
The last mistake is buying the light before choosing the spot. Decide what the light must do — read by, wash a wall, light a stair — then choose power, temperature, and mount for that job. A light chosen for its photo and hung wherever it fits will disappoint; a light chosen for its job rarely does.
Buying Checklist: What to Check Before You Order
Before ordering any no-wire light, check five things. First, the power source against the job: nightly use points to plug-in, brief use to battery, sunlit spots only to solar. Second, the color temperature, matched to the room’s existing lights — one temperature per room, no exceptions. Third, the mounting method against your wall surface and the light’s weight: adhesive ratings assume clean, smooth walls, and textured or damp walls need screws or anchors instead. Fourth, the switch and battery access: a light you cannot reach to switch on, dim, or recharge will end up permanently off. Fifth, the cord route for plug-ins: trace it from outlet to fixture on your sketch, and if it crosses a walkway or hangs in open air, plan the channel or reroute before the light arrives.
Order one light first when the room needs several. Test its temperature, brightness, and mounting at night, in place, before committing to a matching set. A single test light costs little and prevents the most common no-wire regret: a house full of matching lights in the wrong color, all mounted, all needing to be returned.
The Short Version
Choose power by use: plug-in for nightly lights, battery for brief ones, solar only where the sun actually reaches. Hold one color temperature per room, layer softer sources instead of one bright one, place lights by task and height, and mount within ratings. Done that way, no-wire lighting does not look like a workaround — it looks like the room was planned that way.
🛒 Shop This Look: