Photo transfer to wood is a creative way to turn meaningful pictures into lasting wall art. The natural texture of wood gives photos warmth and character that paper prints cannot match. With simple tools and materials, you can create unique decorative pieces that feel personal and handmade.
These 21 ideas explore different ways to transfer photos onto wood surfaces. From rustic family portraits to travel memories and typography designs, each project offers a distinct look while remaining simple enough for beginners to complete at home.
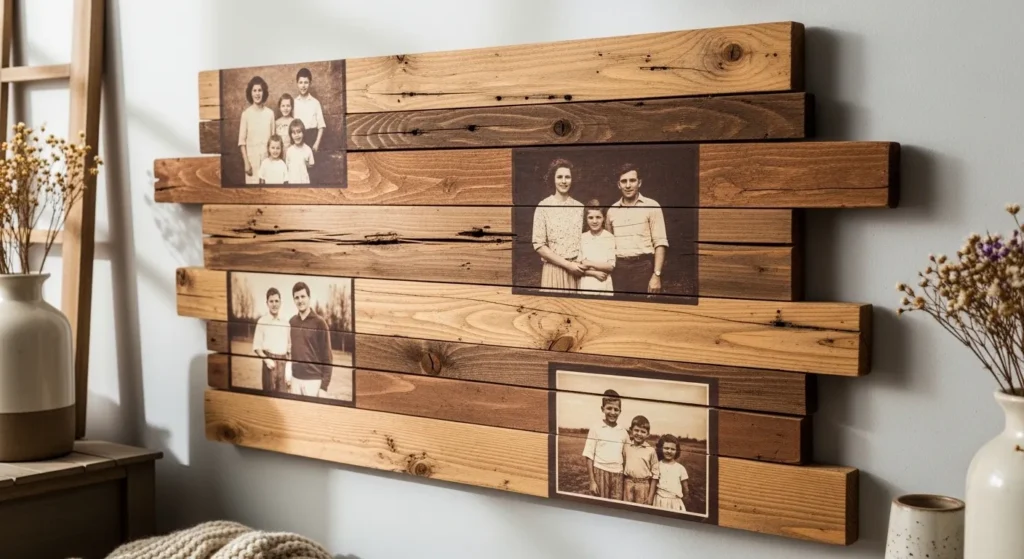
1. Classic Family Photo Transfer on Natural Wood Panels
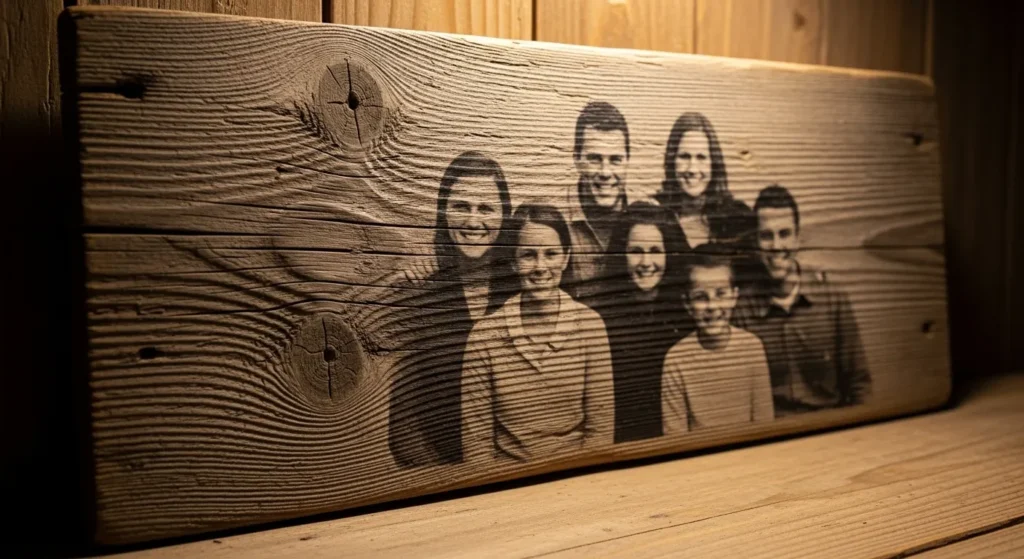
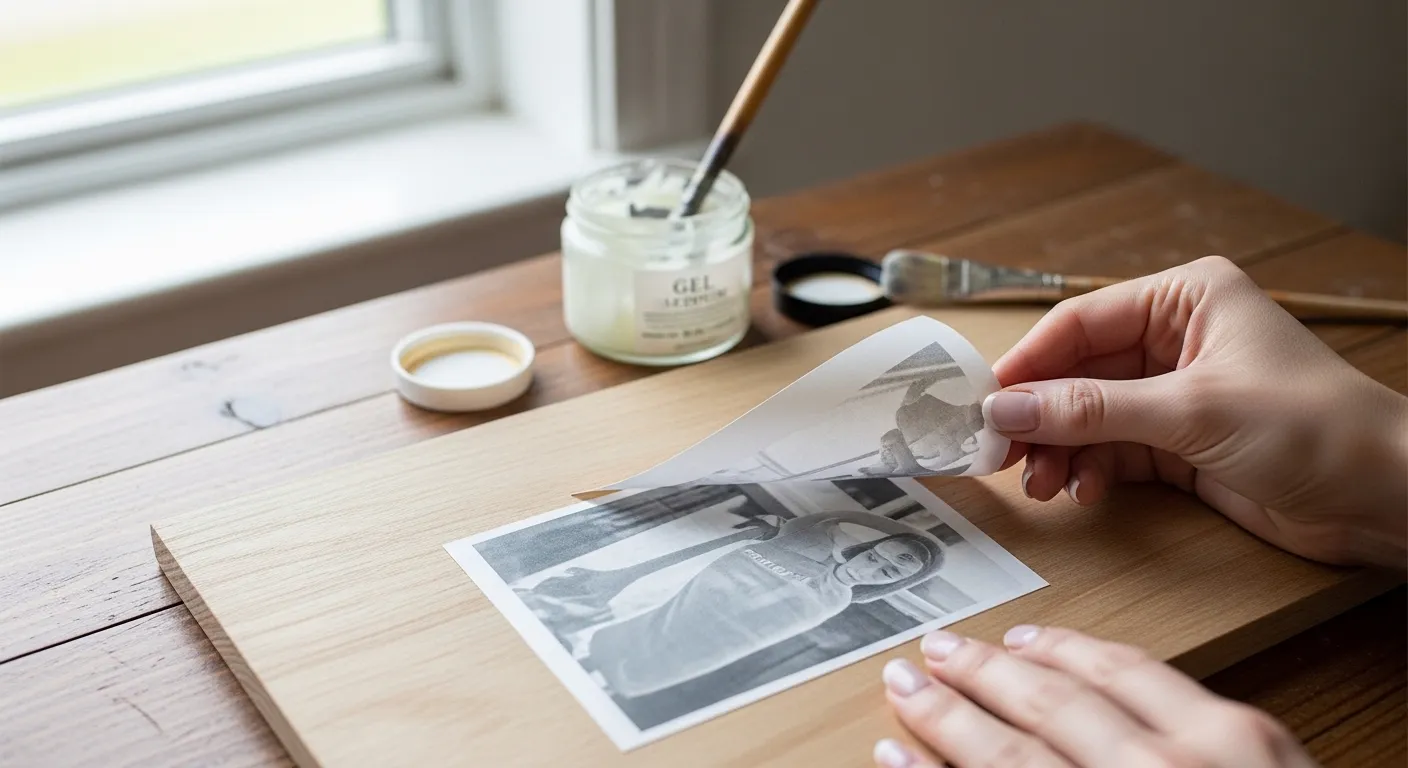
Transferring a family photo onto a natural wood panel creates a timeless decorative piece that highlights both the image and the texture of the wood. The grain patterns show through the lighter areas of the photo, giving the artwork a soft, aged character that feels warm and authentic. This method works particularly well with portraits and group photos where emotional connection is important.
Preparing the wood surface properly improves the final result. Light sanding and cleaning remove dust and rough spots, helping the image transfer evenly. Leaving slightly rough textures visible enhances the handmade quality, creating a piece that feels meaningful rather than factory produced.
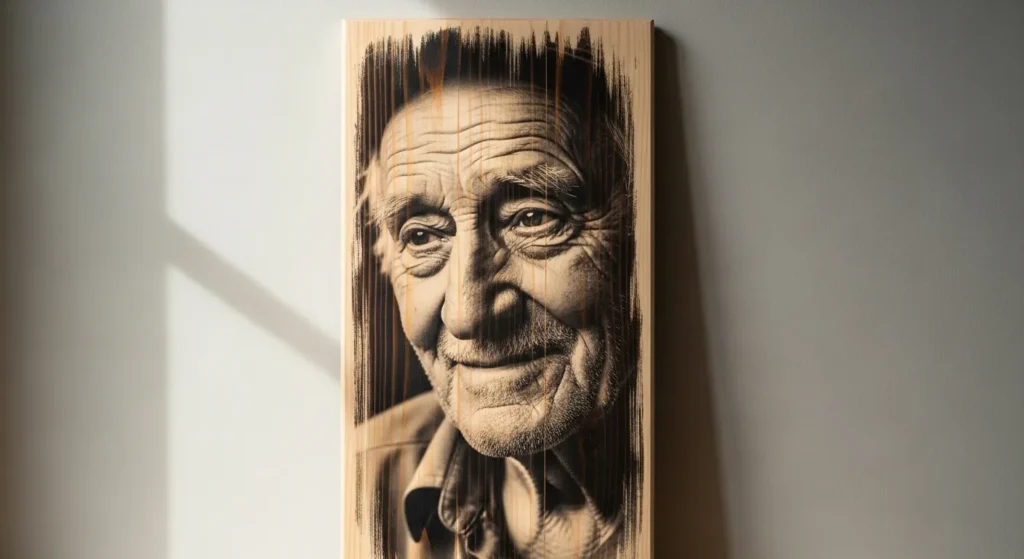
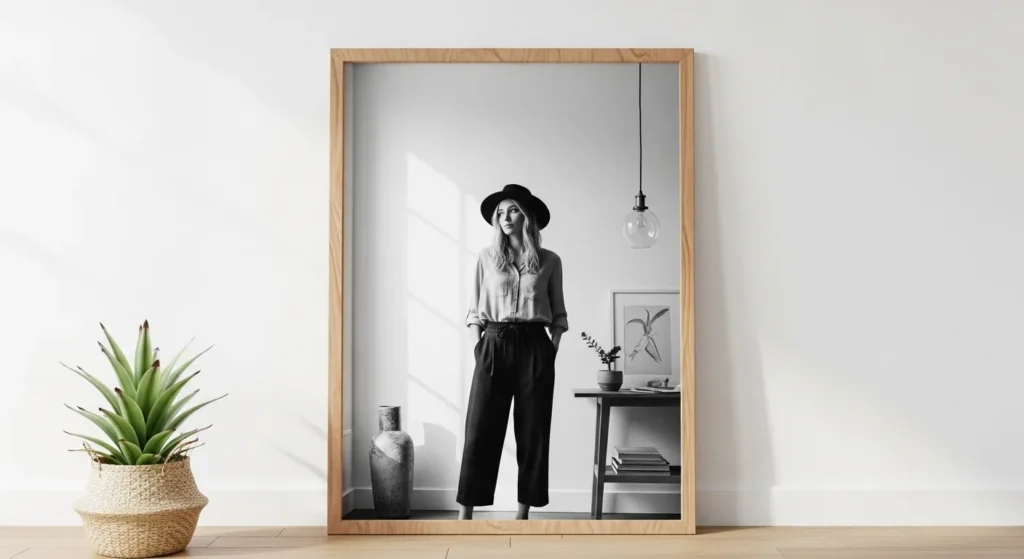
2. Black and White Portrait Transfer for Vintage Style Decor
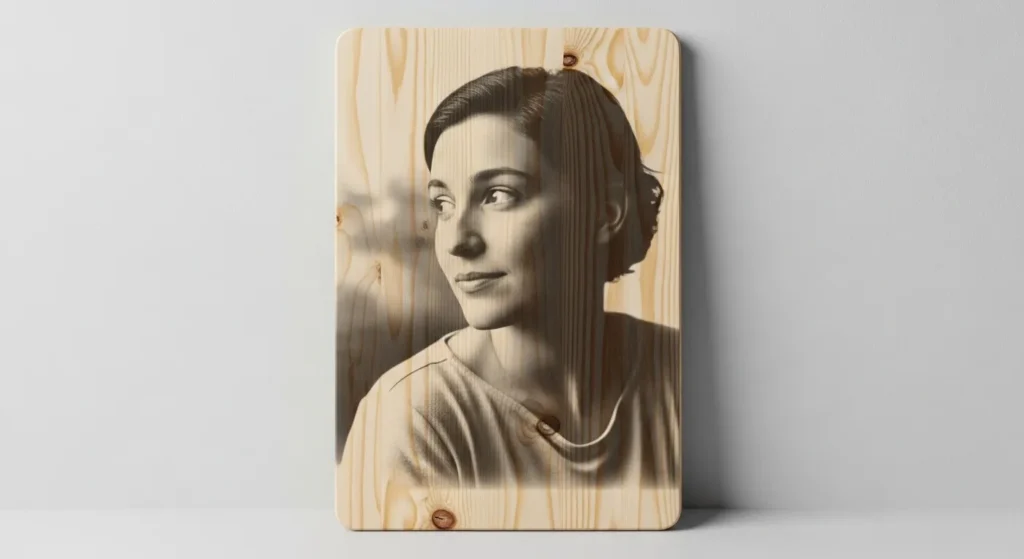
Black and white images translate especially well onto wood surfaces because the contrast highlights details without relying on color. The absence of bright tones allows the wood grain to remain visible while maintaining clarity in facial features and shadows. This style creates a calm and nostalgic appearance that works well in bedrooms and hallways.
Using softer sanding techniques helps preserve fine details in the photo. Smooth wood boards provide more accurate transfers, making them ideal for portraits. Framing the finished piece with simple wood trim enhances the vintage appearance without distracting from the image itself.
3. Travel Memory Wood Transfers with Map Backgrounds
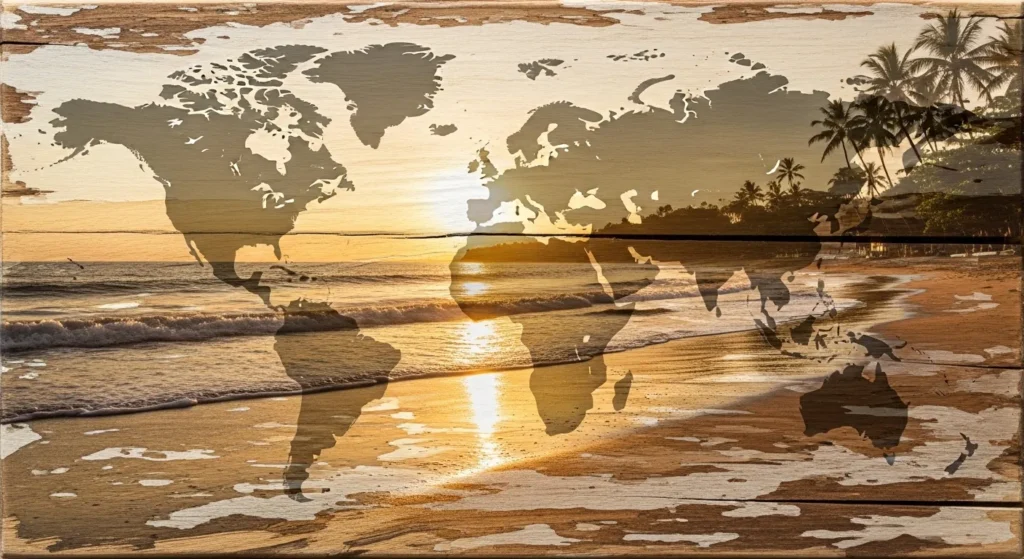
Travel photos become more meaningful when combined with subtle map patterns transferred onto wood. The layered imagery connects memories with locations, turning simple vacation pictures into storytelling artwork. This approach works well for living rooms or home offices where travel themes are appreciated.
Using faded map images as a background ensures the main photo remains clear while still adding context. Slight distressing around the edges creates a worn appearance that complements travel themes and enhances the sense of history within the piece.
4. Polaroid Style Wood Photo Transfers for Casual Displays
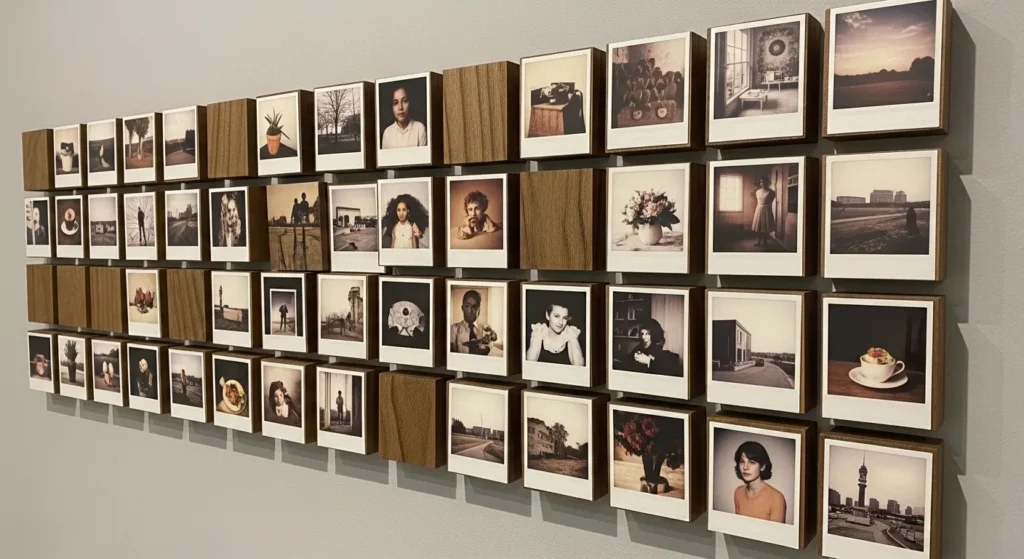
Polaroid-style photo transfers onto small wood squares create playful and flexible displays. Each piece can represent a different memory, allowing walls to evolve as new photos are added. The square shape keeps the arrangement balanced and visually organized.
Spacing between the pieces prevents the wall from feeling crowded. Using consistent wood tones maintains harmony while allowing each photo to stand out individually. This format works well in bedrooms, hallways, or informal living spaces.
5. Large Statement Photo Transfer on Wide Wood Boards
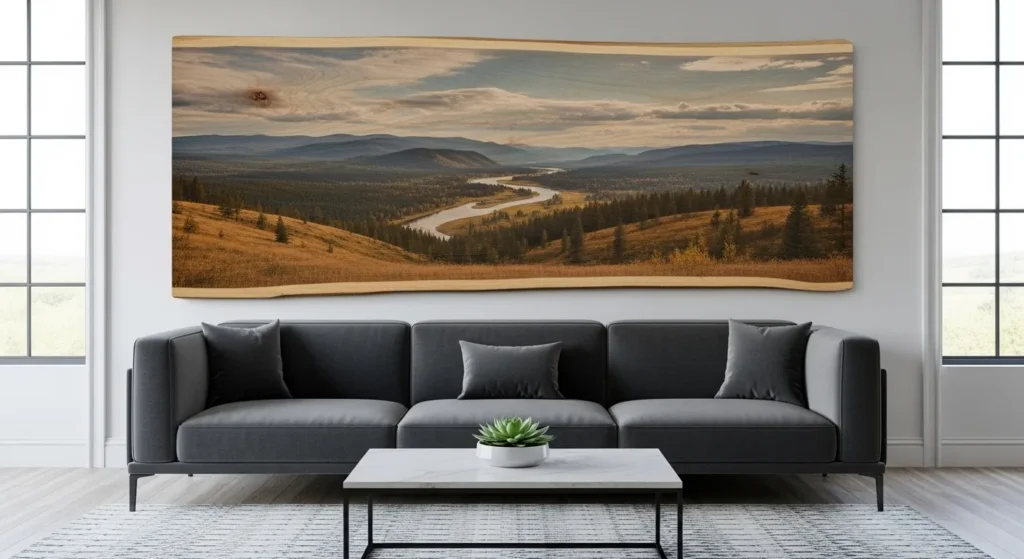
Large-scale transfers create dramatic statement pieces that anchor a room visually. A single wide board allows the image to stretch naturally, making landscapes and panoramic photos especially effective. The size draws attention and creates a focal point within the space.
Choosing a high-resolution photo ensures clarity when enlarged. Sealing the finished surface protects the image and enhances contrast slightly, helping the artwork remain durable and visually strong over time.
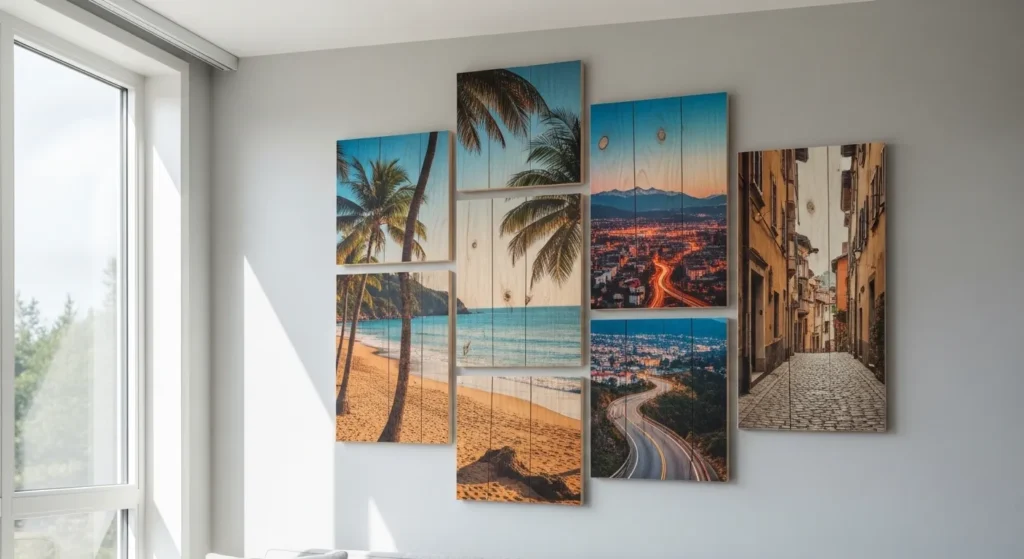
6. Multi-Panel Wood Photo Transfers for Gallery Displays
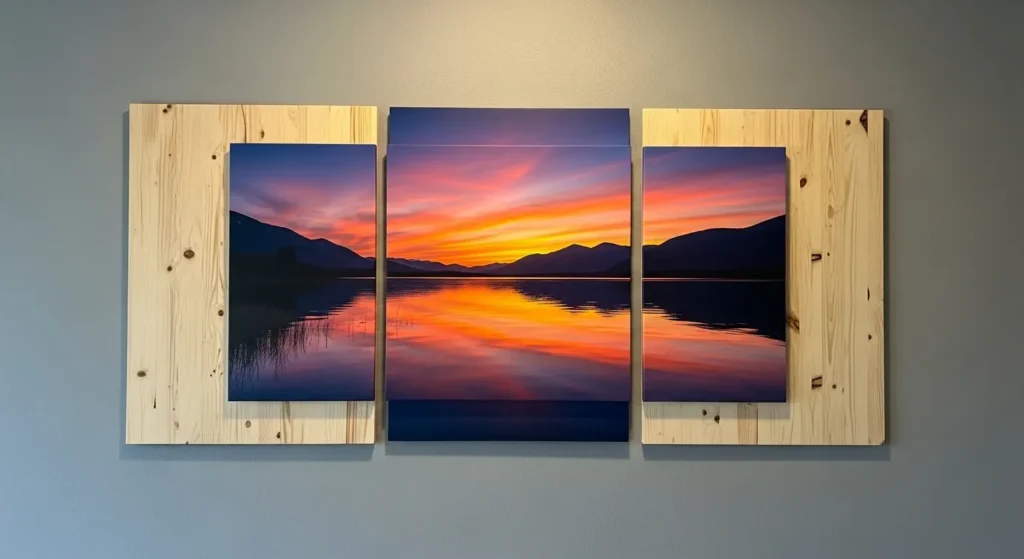
Splitting one photo across multiple wood panels creates a structured gallery-style display. Each panel contributes part of the image, encouraging viewers to step back and see the full composition. This technique adds movement and visual interest to large walls.
Even spacing between panels is essential for balance. Matching wood types and thickness ensures the display looks intentional rather than improvised, creating a cohesive and professional appearance.
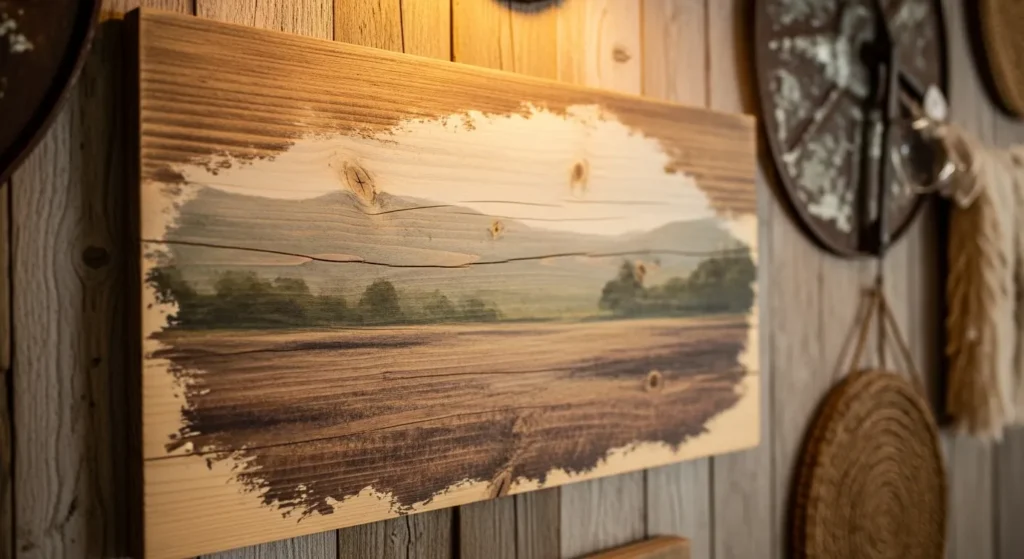
7. Rustic Distressed Edge Wood Transfers for Aged Character
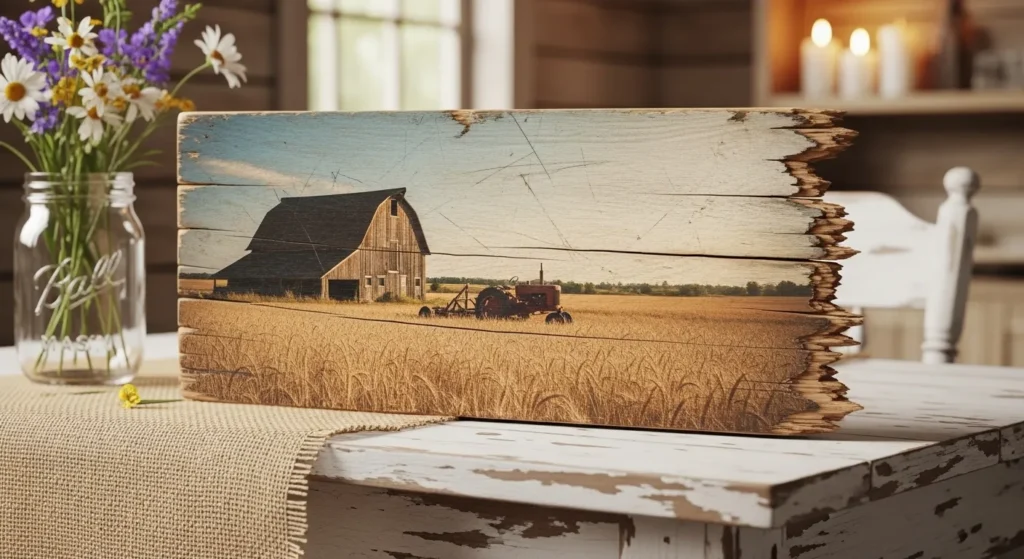
Distressing the edges of wood panels before transferring the image creates an aged appearance that feels authentic and rustic. Slightly uneven surfaces and worn corners enhance the handmade character, making the artwork feel unique.
Using sanding tools to soften edges produces natural-looking wear. Applying a light stain after transferring deepens the wood tone and increases contrast, strengthening the vintage aesthetic.
8. Quote and Photo Combination Wood Transfers
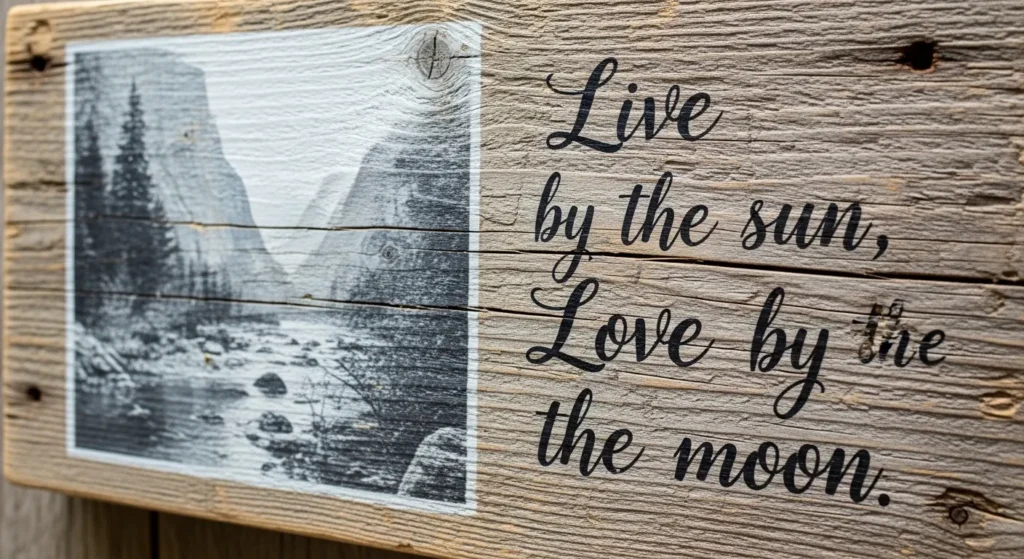
Combining text with photos turns decorative pieces into meaningful reminders. A short quote placed beneath or beside a photo adds emotional depth while maintaining visual balance. This style works well in personal spaces such as bedrooms or offices.
Choosing simple fonts keeps the design readable and cohesive. Proper alignment between text and image ensures the composition feels structured rather than crowded, helping the message remain clear.
9. Soft Color Photo Transfers for Warm Decorative Effect
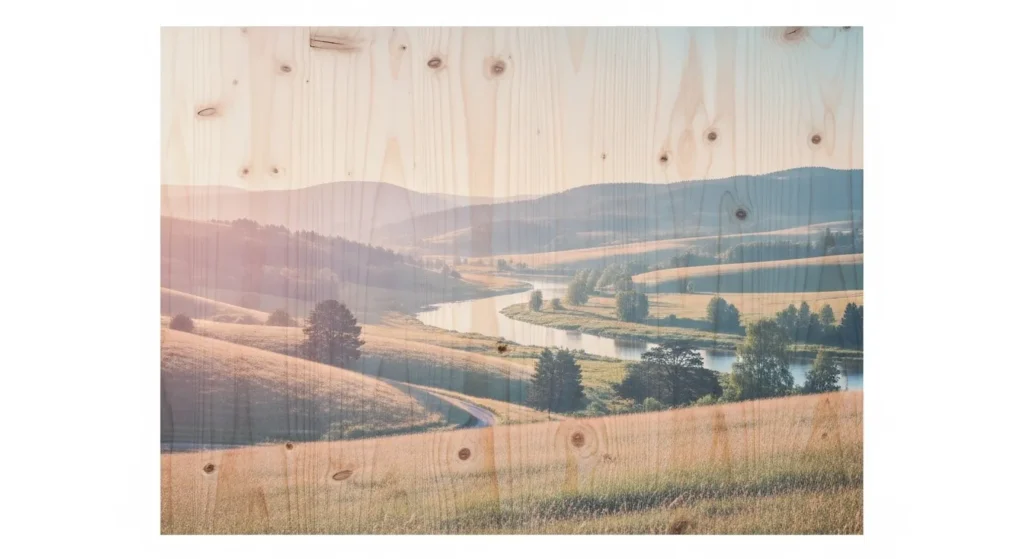
Soft color photos produce warm and inviting wood transfers. Muted tones blend naturally with wood surfaces, creating gentle transitions between image and background. This style works well for nature scenes and relaxed interiors.
Selecting lighter wood enhances subtle colors without overpowering them. A thin protective finish preserves color while maintaining the natural texture that makes wood transfers appealing.
10. Vertical Wood Photo Transfers for Narrow Wall Spaces
Vertical boards work well in narrow wall areas where horizontal artwork would feel crowded. Portrait photos or architectural images fit naturally into this format, creating elegant and balanced displays.
Maintaining consistent margins around the image keeps the composition clean. Vertical formats help draw the eye upward, making small spaces feel slightly taller and more open.
11. Wood Slice Photo Transfers for Natural Decorative Pieces
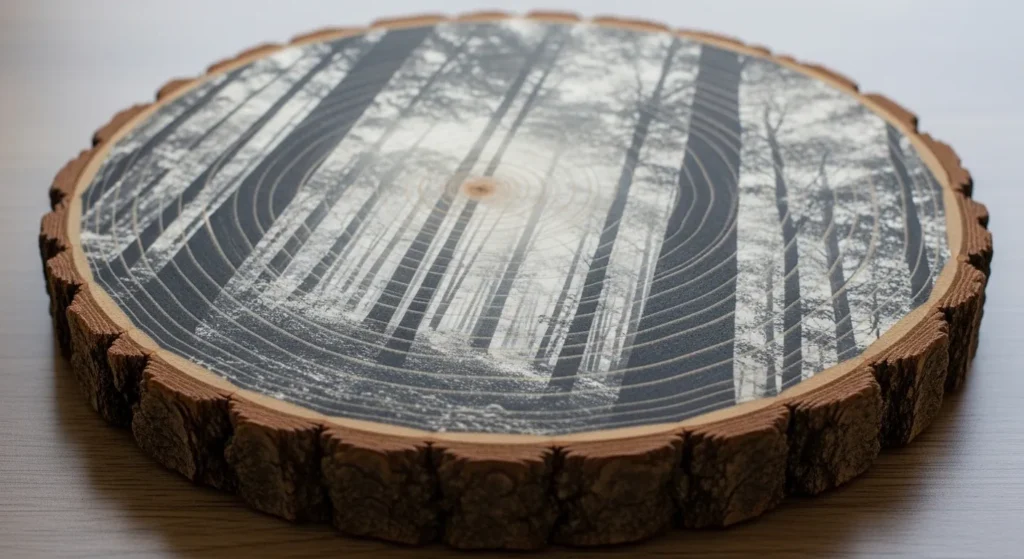
Wood slices with visible bark edges create organic decorative pieces that highlight the natural shape of the material. The irregular outline adds interest and makes each piece unique.
Sanding the center area improves transfer quality while leaving edges natural. This balance keeps the artwork visually appealing and authentic.
12. Vintage Sepia Photo Transfers for Warm Rustic Wall Displays
Sepia-toned photo transfers create a warm and nostalgic look that works beautifully in traditional and rustic interiors. Older photographs or black-and-white images gain extra depth when transferred onto natural wood surfaces with visible grain.
The warm brown shades blend into the wood rather than sitting on top, producing a soft aged effect that feels authentic instead of artificial. This method works especially well for family portraits, travel memories, or historic photographs that deserve a timeless presentation.
Choose reclaimed wood boards with visible imperfections because small marks and color variations improve the finished piece. After transferring the image, lightly sand selected areas to reveal more wood grain and soften the photo edges. A matte protective coat keeps the piece durable without making it shiny. This approach produces wall art that feels personal and lived-in rather than mass-produced.
13. Black and White Contrast Transfers for Modern Interiors
Black and white photo transfers offer a clean and striking style that fits modern interiors well. High-contrast images stand out clearly against light wood panels, creating artwork that looks intentional and structured. Portraits, architectural photography, and city scenes tend to work especially well because strong lines remain clear after the transfer process. The simplicity of monochrome images keeps the design balanced without making the wall feel crowded.
Use smooth wood panels with minimal knots if you want sharper details in the final image. Sanding the surface thoroughly before transferring improves clarity and prevents uneven patches. After the transfer is complete, sealing with a matte finish preserves the image without creating glare. The finished result works well in living rooms, offices, or hallways where clean design matters.
14. Mixed Media Photo Transfers With Painted Backgrounds
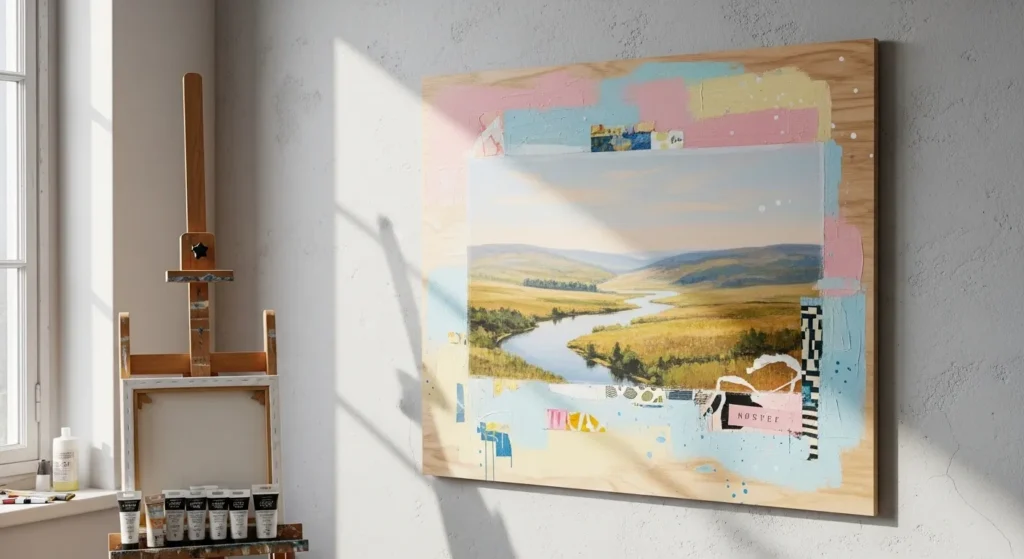
Adding paint behind a transferred photo introduces extra color and depth. Instead of transferring directly onto bare wood, a soft painted background creates contrast and helps the image stand out. Neutral shades such as beige or soft grey maintain a calm look, while pastel tones introduce subtle color without overpowering the photo. This method allows more creative freedom compared to traditional transfers.
Apply paint in thin layers so that wood grain still shows through slightly. Once dry, transfer the image normally and allow some edges to remain imperfect for a handmade appearance. Light sanding around the edges blends the photo into the painted surface. This method produces artwork that looks unique and expressive rather than mechanical.
15. Large Statement Wood Transfers for Feature Walls
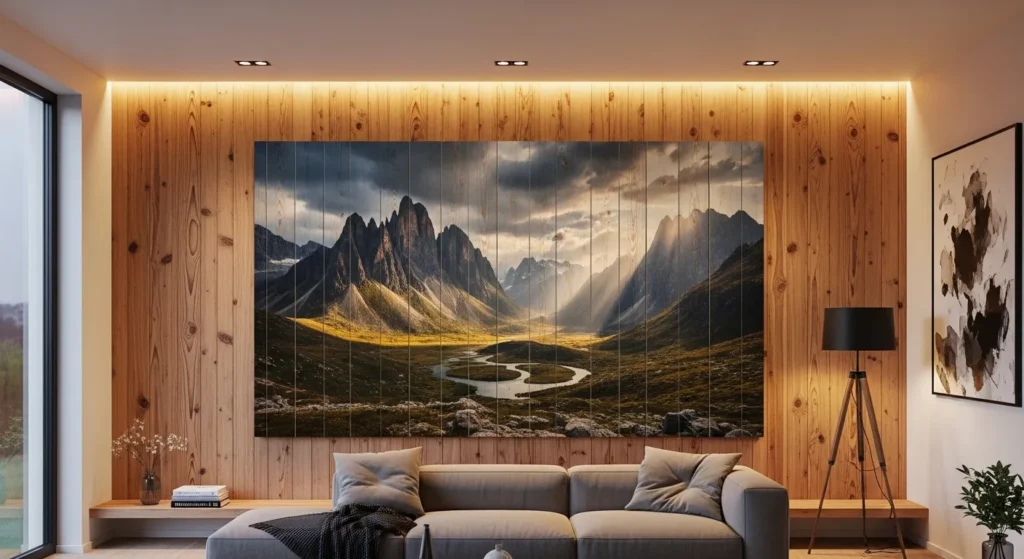
Large photo transfers can serve as the main visual focus in a room. A single oversized wood panel featuring a meaningful photograph creates a strong presence without needing additional decorations. Landscapes, architectural scenes, or wide family photos work especially well at larger sizes because the details remain clear even from a distance. This approach works particularly well above sofas, beds, or consoles.
Use thick wood panels to prevent warping over time, especially for larger pieces. Careful alignment during the transfer stage is important because repositioning is difficult once the process begins. After sealing the finished piece, mount it securely using strong wall anchors. A large wood transfer provides a custom artwork feel that standard prints rarely achieve.
16. Multi-Panel Wood Transfers for Coordinated Displays
Dividing one photo into multiple wood panels creates a coordinated wall display with visual rhythm. Instead of one large board, several smaller panels form a connected composition that spreads across the wall. This arrangement works especially well for panoramic photos or travel scenes that naturally extend across space. The spacing between panels gives the design breathing room.
Keep consistent spacing between panels so the arrangement looks balanced. Each board should be cut to similar thickness so the pieces align evenly on the wall. After transferring each section, seal all panels with the same finish to maintain consistency. Multi-panel transfers create a structured look that feels intentional and organized.
17. Soft Faded Edge Transfers for Handmade Character
Soft faded edges help photo transfers look more natural on wood surfaces. Instead of sharp borders, gently blending the photo edges into the wood grain creates a smoother transition. This technique works especially well for portraits and nature images where a softer appearance feels appropriate. The result looks more like a handcrafted piece than a printed image.
After the transfer dries, lightly rub the outer edges with a damp cloth or fine sandpaper. This removes small areas of the image and allows the wood texture to appear through. Applying a light protective coat preserves the finish while keeping the soft look intact. This approach gives wall art a relaxed and authentic appearance.
18. Typography and Quote Transfers on Wood
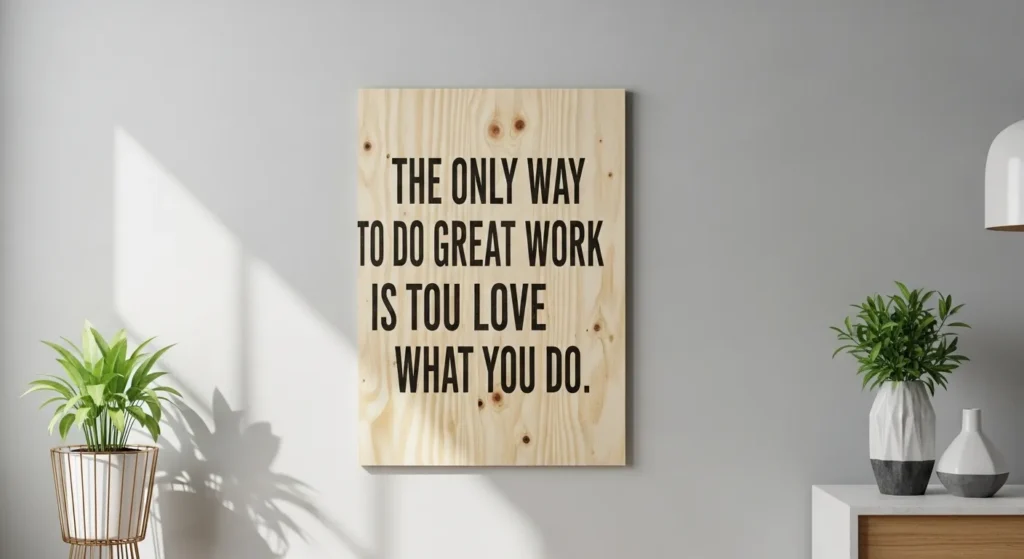
Text-based transfers are simple but effective decorative pieces. Favorite quotes, meaningful phrases, or single words can be transferred onto wood to create personal artwork. Clear typography stands out well on light wood surfaces and remains easy to read from a distance. This style works well in bedrooms, offices, or entryways where short messages feel appropriate.
Choose bold fonts because thin lettering may not transfer cleanly. Preparing the wood surface carefully helps prevent broken lines in the text. After sealing the finished piece, mount it at eye level so the message remains readable. Typography transfers provide a straightforward way to create meaningful decorations.
19. Distressed Whitewashed Wood Photo Transfers
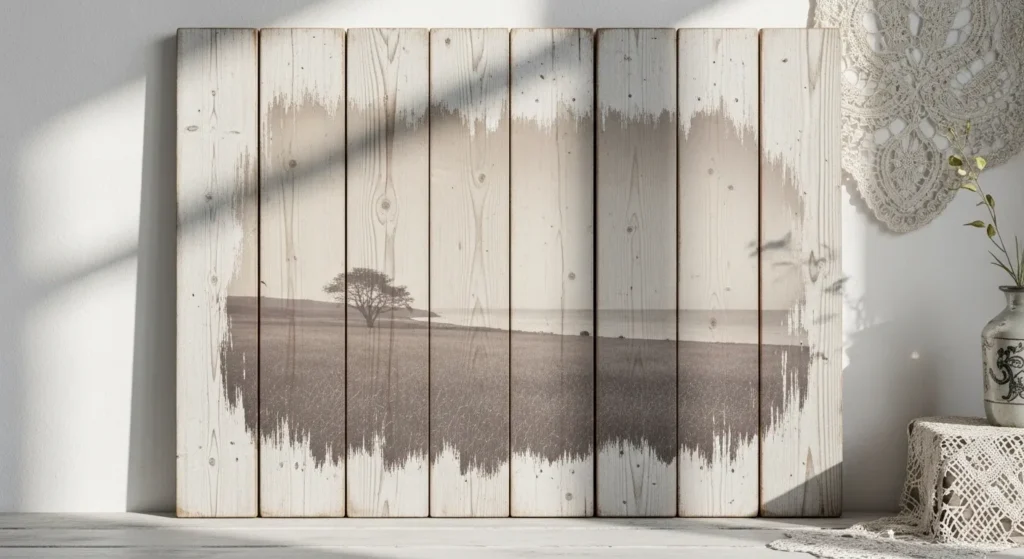
Whitewashed wood creates a lighter background that softens transferred images. A thin layer of diluted white paint brightens the wood while still allowing grain to show through. Photos transferred onto whitewashed surfaces appear softer and more delicate compared to darker wood. This method works especially well in light and airy interiors.
Apply a thin whitewash coat and wipe away excess paint before it dries. Once dry, transfer the image normally and allow slight fading in some areas. Light sanding enhances the worn appearance and reveals small patches of natural wood. This style creates wall art that feels relaxed and comfortable.
20. Seasonal Photo Transfers for Rotating Decor
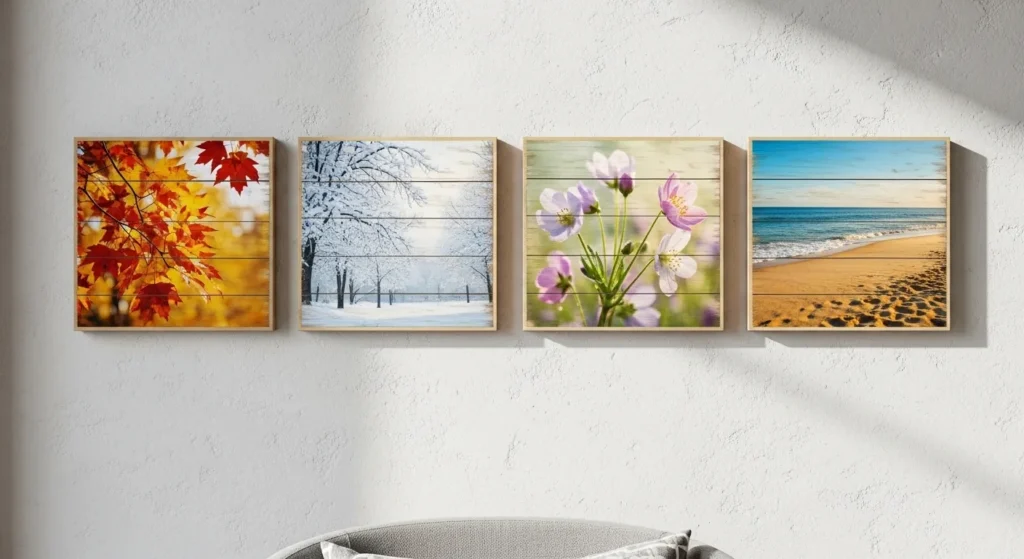
Seasonal transfers allow you to refresh wall decor throughout the year. Small wood panels featuring different seasonal images can be swapped easily as seasons change. Autumn landscapes, winter scenes, spring flowers, and summer travel photos each bring a different mood. Rotating artwork keeps the space feeling fresh without major changes.
Use similar panel sizes so seasonal pieces can be exchanged easily. Store unused panels in a dry place to protect the wood. Applying protective finish helps preserve the images over time. Seasonal transfers provide variety while keeping a consistent style.
21. Small Gift-Sized Wood Photo Transfers
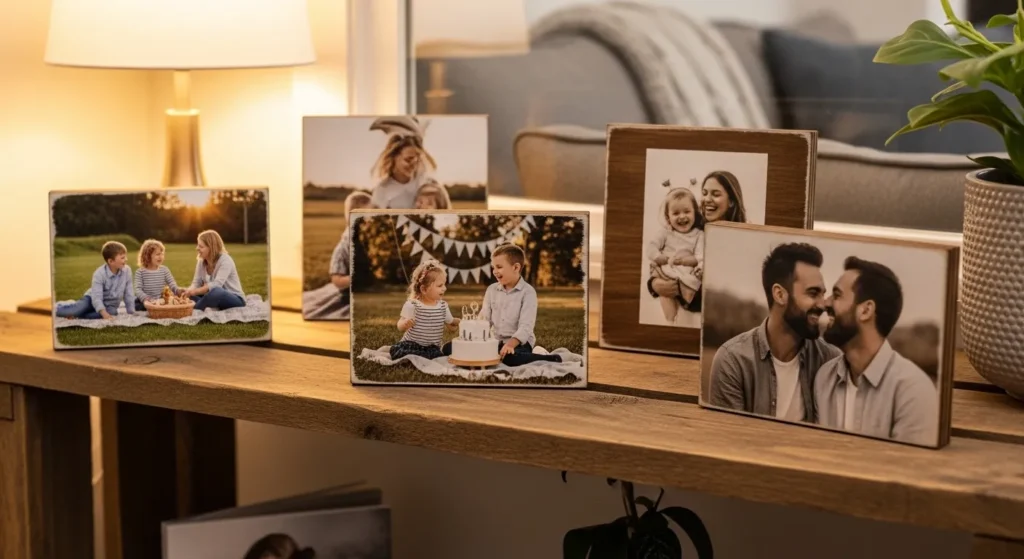
Small wood transfers make thoughtful handmade gifts. Compact panels featuring meaningful photos can be displayed on shelves or small wall spaces. This format works well for birthdays, holidays, or special occasions because each piece feels personal. The handmade aspect makes the gift more meaningful than store-bought decorations.
Choose small smooth wood pieces to simplify the transfer process. Clear images with simple backgrounds work best at smaller sizes. After sealing the finished piece, wrap carefully to avoid scratches. Small wood transfers offer a practical and personal creative project.
Conclusion
Photo transfers onto wood offer a simple way to create personal wall art with lasting character. Different techniques allow you to adjust the look from rustic and aged to clean and modern depending on the materials and finishing methods used. The natural wood surface ensures that every piece looks slightly different, which adds authenticity to the final result.
With basic tools and patience, these projects can produce artwork that feels meaningful and custom-made. Whether creating large statement pieces or small decorative panels, wood photo transfers provide a flexible approach to decorating walls with personal memories and creative designs.