
As an Amazon Associate, I earn from qualifying purchases. This means I may earn a commission if you purchase through links on this page — at no extra cost to you.
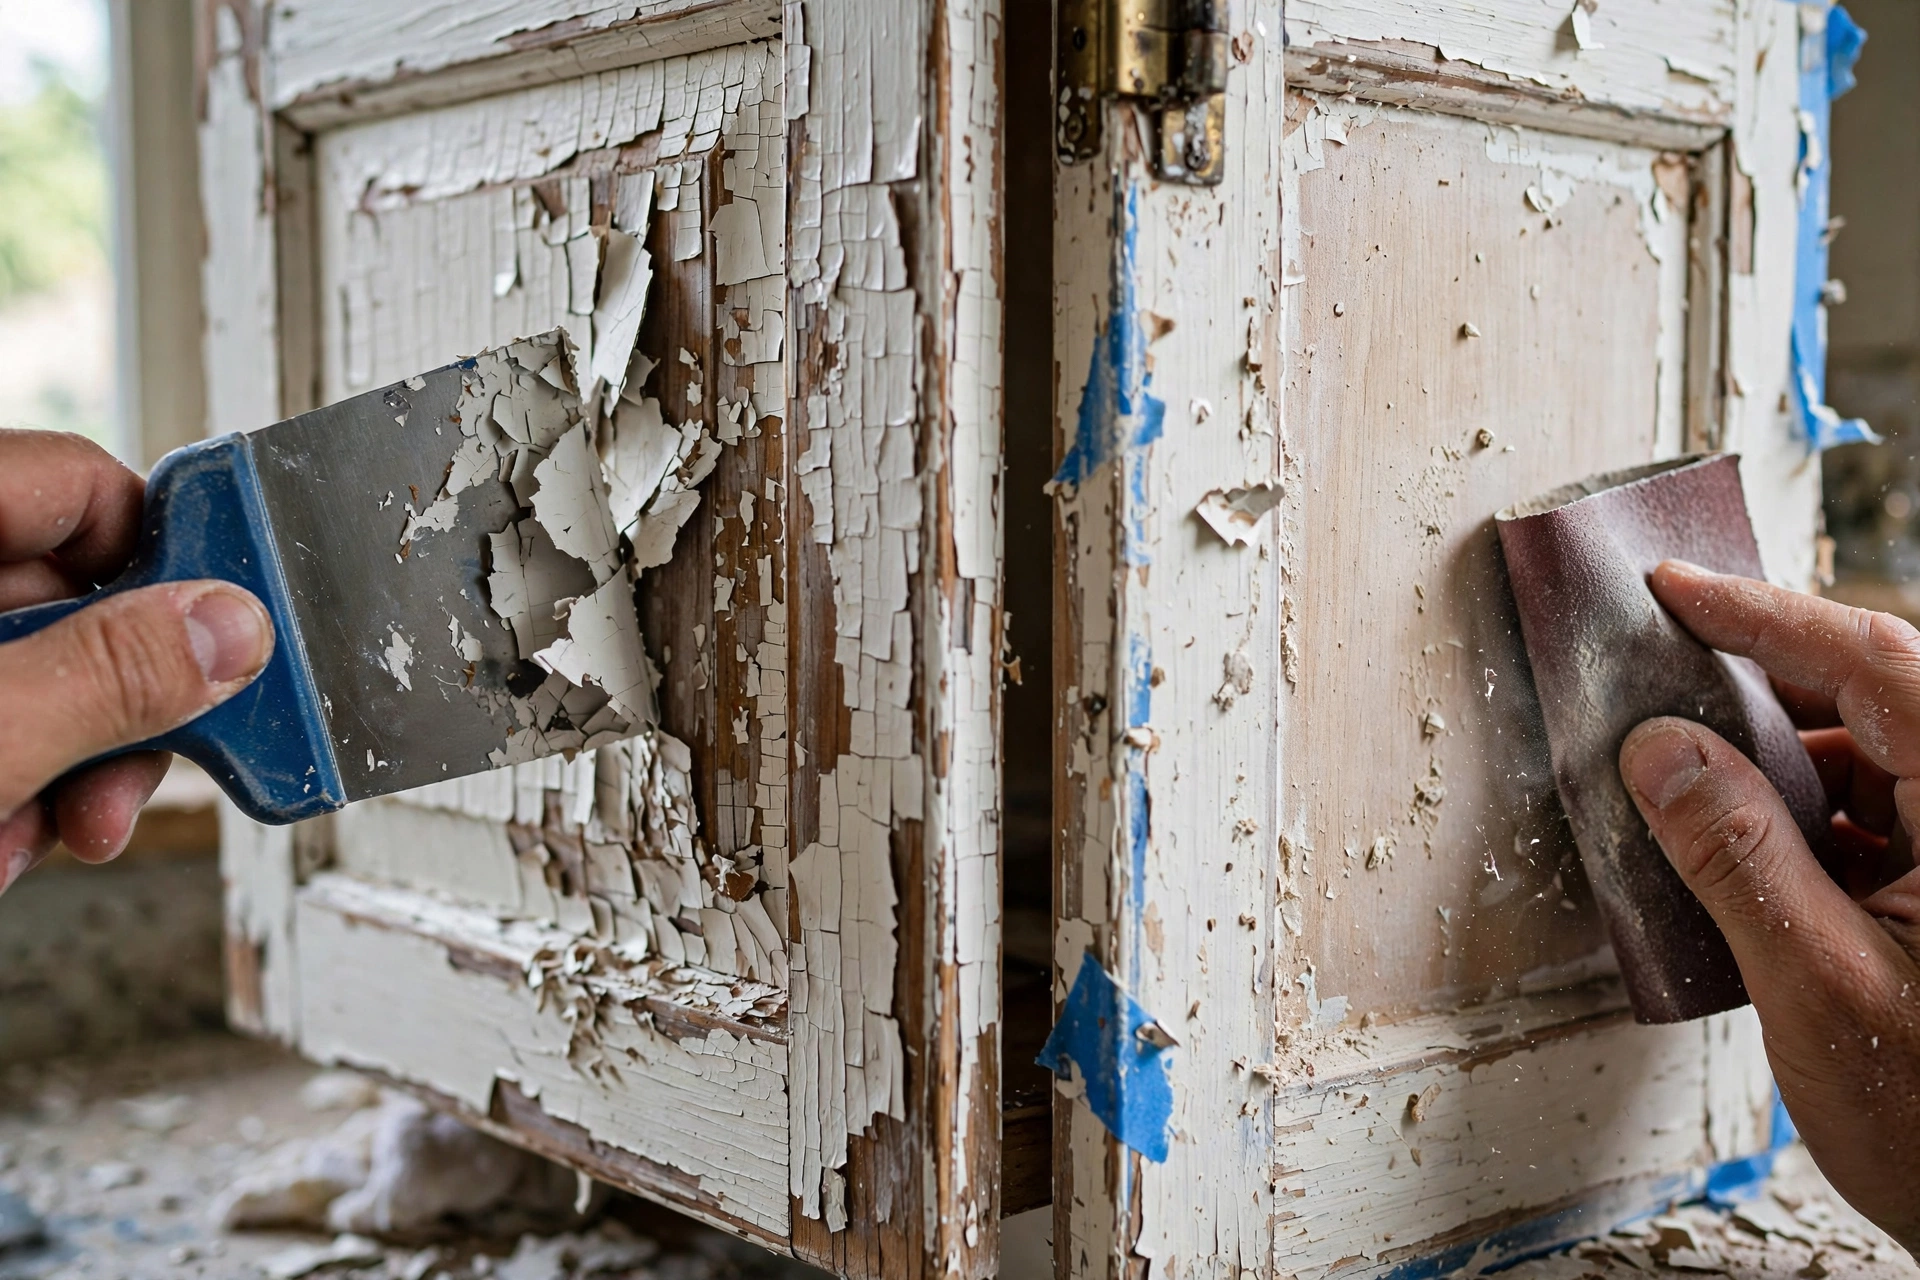
Cabinet paint peels when the surface wasn’t properly prepped — usually grease wasn’t removed, the wrong primer was used, or paint was applied over a glossy finish without deglossing. To fix peeling, scrape off all loose paint, sand the edges smooth, clean thoroughly, apply a bonding primer like BIN Shellac, then repaint with cabinet-grade enamel. Prevention is all about prep: degrease, prime, and use the right products.
Common Causes
Grease Under the Paint
The #1 cause. Cooking oils prevent adhesion. If paint peels in sheets revealing greasy wood underneath, inadequate degreasing is the culprit.
Wrong Primer (or None)
Regular wall primer doesn’t bond to slick cabinet surfaces. You need shellac-based (BIN) or urethane bonding primer (STIX).
Painting Over Gloss Without Prep
Paint can’t grip shiny surfaces. Either sand to dull the gloss or use a bonding primer designed for slick surfaces.
Moisture
Steam from dishwashers and stoves can lift paint over time, especially near the stove and sink.
How to Fix Peeling Paint
1. Scrape off all loose and peeling paint with a putty knife.
2. Sand the transition edges smooth with 150-grit, then 220-grit.
3. Clean thoroughly with degreaser.
4. Apply BIN Shellac primer to bare spots, extending slightly onto sound paint.
5. Repaint with two thin coats of cabinet enamel.
6. Allow 30-day cure before heavy use.
When to Start Over
If more than 30% of the surface is peeling, it’s faster to strip and start fresh than to patch. Chemical strippers or heat guns remove failed paint efficiently.
How to Tell What’s Causing Your Peeling: A Diagnostic Guide
The pattern of the peeling tells you the cause — and the cause determines the fix. Before scraping anything, read these clues:
🛒 Shop This Look:
- Large sheets lifting cleanly, revealing bare or greasy wood: Adhesion failure from inadequate prep — almost always grease under the paint or no bonding primer. The paint never actually bonded; it was just sitting on the surface. This is the most common pattern on DIY cabinet jobs.
- Small chips at edges, corners, and high-touch areas (around handles, door edges): Normal wear on an otherwise sound paint job, or paint that is too soft for the abuse (wall paint used on cabinets instead of enamel). If the surrounding paint is firmly bonded, this is a touch-up situation, not a strip situation.
- Bubbling or blistering, especially near the stove, dishwasher, or sink: Moisture or heat lifting the paint film. Steam from cooking and dishwashers migrates behind the paint at edges and seams. Heat from ovens and toasters can also soften paint films over time.
- Cracking that looks like alligator skin, with peeling at the cracks: Incompatible paint layers — typically latex applied over oil-based paint without proper primer, or a new coat applied before the previous one cured. The layers expand and contract at different rates until they separate.
- Peeling only on the backs or edges of doors near hinges: Often a sign the doors were rehung before the paint fully cured. Paint that feels dry can still be soft underneath for weeks; hardware pressure on uncured paint breaks the bond.
Match your pattern before choosing a repair strategy — spot-fixing an adhesion failure wastes time, because the surrounding paint will keep letting go.
The Prep Protocol That Prevents Peeling
Professional cabinet painters spend more time on prep than on painting, and the ratio is the whole secret. Whether you are fixing a small area or repainting an entire kitchen, this is the sequence that makes paint stick:
- Remove doors, drawers, and hardware. Label every door and drawer with its position (painter’s tape on the back edge) — they are not as interchangeable as they look. Remove hinges, handles, and knobs; paint around hardware, never over it.
- Degrease twice. Kitchen cabinets accumulate years of cooking grease, even when they look clean. Wash all surfaces with a degreasing cleaner (TSP substitute or a dedicated cabinet degreaser), rinse, and repeat. The second pass matters — the first loosens, the second removes. If the rinse water still beads on the surface, there is still grease.
- Scuff-sand everything. Sand all surfaces with 150-grit to dull glossy finishes and give the primer something to grip, then follow with 220-grit for smoothness. You are not trying to remove the old finish entirely — just degloss and create tooth. Sand with the grain on visible wood.
- Fill and repair. Fill dents, dings, and grain with wood filler, let it dry fully, then sand flush. Caulk the seams where cabinet frames meet walls and where face frames meet — but never caulk door panels to their frames; floating panels need to move.
- Clean the dust. Vacuum all surfaces, then wipe with a tack cloth or damp microfiber. Paint dust left on the surface becomes adhesion-breaking grit under the new finish.
- Prime with the right primer. On bare wood, previously painted surfaces, or slick laminates, use a shellac-based primer (like BIN) or a urethane bonding primer (like STIX). Standard wall primer does not bond to cabinet surfaces — this single product choice causes more peeling than any other mistake. One full coat, applied thin and even.
- Sand the primer lightly. Once dry, a quick pass with 220-grit knocks down raised grain and brush marks, giving the topcoat a smooth foundation. Wipe dust again.
Only after all seven steps should paint touch the cabinets. Skipping steps is how you end up redoing the job in two years.
Choosing Products That Actually Stick
Cabinets are the hardest-working painted surfaces in a home — they get touched, bumped, steamed, and cleaned constantly. Standard wall paint is not formulated for this abuse.
Primers, ranked for cabinets: Shellac-based primer (BIN and equivalents) bonds to nearly anything — bare wood, old oil paint, laminate, even glass — and blocks stains and tannin bleed. It smells strong and requires denatured alcohol cleanup, but nothing sticks better. Urethane-modified bonding primers (STIX and equivalents) are the lower-odor alternative with excellent adhesion to slick surfaces. Oil-based primers are a third option but are increasingly restricted and slow to dry. What to avoid: standard latex wall primer, “paint and primer in one” products (the primer component is minimal), and skipping primer entirely.
Topcoats that survive kitchens: The best cabinet finishes are urethane-modified acrylic enamels or alkyd enamels — paints specifically labeled for cabinets, trim, and doors. They cure to a hard, scrubbable film that resists chipping. Standard acrylic wall paint stays comparatively soft and chips at the slightest impact; it is the wrong product no matter how good the color looks. Apply two thin coats rather than one thick one — thick coats skin over while staying soft underneath, which leads to peeling.
What about chalk paint or milk paint on cabinets? These decorative finishes are formulated for furniture, not the daily abuse of kitchen cabinets. They require wax or topcoat sealing to survive, and even then they chip more readily than proper cabinet enamel. They have their place on a side table; the kitchen is not it.
The Full Strip-and-Start-Over Process
When more than about 30% of the surface is failing, spot repair becomes whack-a-mole. A full strip gives you a clean foundation:
🛒 Shop This Look:
- Choose your removal method. Chemical strippers (paste or gel formulas) are the most thorough for detailed cabinet profiles — apply, wait, scrape. A heat gun works faster on flat areas but risks scorching wood and releases fumes from old paint (test for lead in pre-1978 homes before using heat). Sanding alone is the slowest and generates the most dust. Most cabinet refinishers use a combination: stripper for profiles, sander for flats.
- Work safely. Chemical strippers need ventilation, chemical-resistant gloves, and eye protection. Heat guns need a respirator if there is any chance of lead paint. Keep a fire extinguisher nearby when using heat.
- Strip in sections. Apply stripper to one door or one frame section at a time, following the product’s dwell time. Scrape softened paint with a plastic scraper on delicate areas and a metal putty knife on flats. Use contoured scrapers or old toothbrushes for detailed profiles.
- Neutralize and clean. Most strippers require a neutralizing wash afterward (the product label specifies what). Skip this and the residue can interfere with new primer adhesion — trading one peeling cause for another.
- Sand to bare, even wood. After stripping, sand progressively (120, then 150, then 220 grit) to remove residue and even the surface. The goal is clean wood with uniform texture, ready for the full prep protocol above.
A full strip of an average kitchen is a multi-weekend project. It is tedious but straightforward — and the result lasts a decade or more when followed by proper priming and enameling.
Application Mistakes That Cause Peeling Later
Even perfect prep fails if the paint goes on wrong. These application errors create peeling that shows up months later:
- Coats applied too thick. Thick coats look efficient but cure poorly — the surface skins while the interior stays soft, and the weak interior eventually lets go. Two thin coats always outperform one thick coat.
- Recoating too soon (or too late). Every paint has a recoat window on the label. Recoating before the first coat has set traps solvents; waiting too long (days beyond the window for some products) means the second coat cannot bond chemically to the first. Follow the label, not your schedule.
- Painting in bad conditions. High humidity slows curing and traps moisture under the film; cold temperatures prevent proper film formation; painting in direct heat dries the surface before it can level. Aim for 50–85°F and moderate humidity, and never paint cabinet doors lying in direct sun.
- Confusing “dry” with “cured.” Latex and acrylic enamels feel dry in hours but take up to 30 days to fully cure to maximum hardness. Hanging doors, installing hardware, and scrubbing during the cure window damages the still-soft film. Treat freshly painted cabinets gently for a full month.
- Skipping the sand-between-coats. A quick 220-grit scuff between coats gives each layer mechanical tooth to grip. It takes minutes per door and meaningfully improves inter-coat adhesion.
How Long Should a Cabinet Paint Job Last?
A properly prepped and painted cabinet job using cabinet-grade enamel should last 8–12 years in a typical kitchen before showing meaningful wear. High-use kitchens (heavy cooking, kids, no range hood) trend toward the lower end; gentle-use kitchens exceed it. The first failures usually appear at high-touch points — around handles and on door edges — years before the faces show wear. When peeling appears within the first two years, it is almost always a prep or product failure, not normal wear — and it will not stop on its own.
Frequently Asked Questions
Can I just paint over peeling paint after scraping the loose bits?
Only if the surrounding paint is firmly bonded — test by pressing masking tape firmly onto the painted surface and ripping it off. If paint comes with the tape, the bond is failing beyond the visibly peeling area, and spot repair will fail progressively. Sound surrounding paint means you can feather-sand the edges, prime, and touch up.
Do I really need to sand if I use a bonding primer?
Bonding primers are formulated to grip slick surfaces, and on laminate or factory-finished cabinets they can work with just a thorough degrease. On previously painted wood, a scuff sand is still cheap insurance — it takes minutes and removes the one variable the primer cannot control. When in doubt, sand.
Why is my paint peeling only around the handles?
Handle areas get the most touching, and hands deposit oils and moisture constantly. If the paint was marginally bonded, handle zones fail first. It can also mean the doors were rehung before full cure and the hardware stressed the soft paint. Fix by sanding back to sound paint, repriming, and repainting — and consider adding a clear protective bumper behind handles.
Is peeling paint on cabinets a health concern?
The peeling paint itself is mainly an aesthetic and durability issue. However, if your home was built before 1978, underlying paint layers may contain lead — do not sand or heat-strip without testing first. Lead test kits are inexpensive and available at hardware stores; if positive, follow EPA lead-safe practices or hire a certified professional.
Should I hire a professional or DIY the fix?
Small touch-ups and single-door repairs are very DIY-able. A full kitchen strip-and-repaint is a large, tedious project — typically 40–80 hours of work for a first-timer. If the failure is widespread, get quotes from cabinet-painting specialists (not general handymen); the cost is significant, but so is the labor you would be taking on, and professionals spray for a factory-smooth finish that is hard to achieve with a brush.
🛒 Shop This Look:




1 thought on “Cabinet Paint Peeling? Causes and Fixes”
Comments are closed.