
As an Amazon Associate, I earn from qualifying purchases. This means I may earn a commission if you purchase through links on this page — at no extra cost to you.
Industrial wall storage works because of a material pairing, not a style label. Wood brings warmth, weight, and a surface that is easy to cut, sand, and finish. Metal brings brackets, rods, and frames that hold weight across a span without bending. Used together, they solve the two problems that ruin wall storage on their own: all-wood shelving that sags under books, and all-metal shelving that looks cold and shows every fingerprint. This guide covers how to plan, choose, and hang wood-and-metal storage so it stays up, stays level, and still looks good after a year of daily use.
Why Wood and Metal Work Together
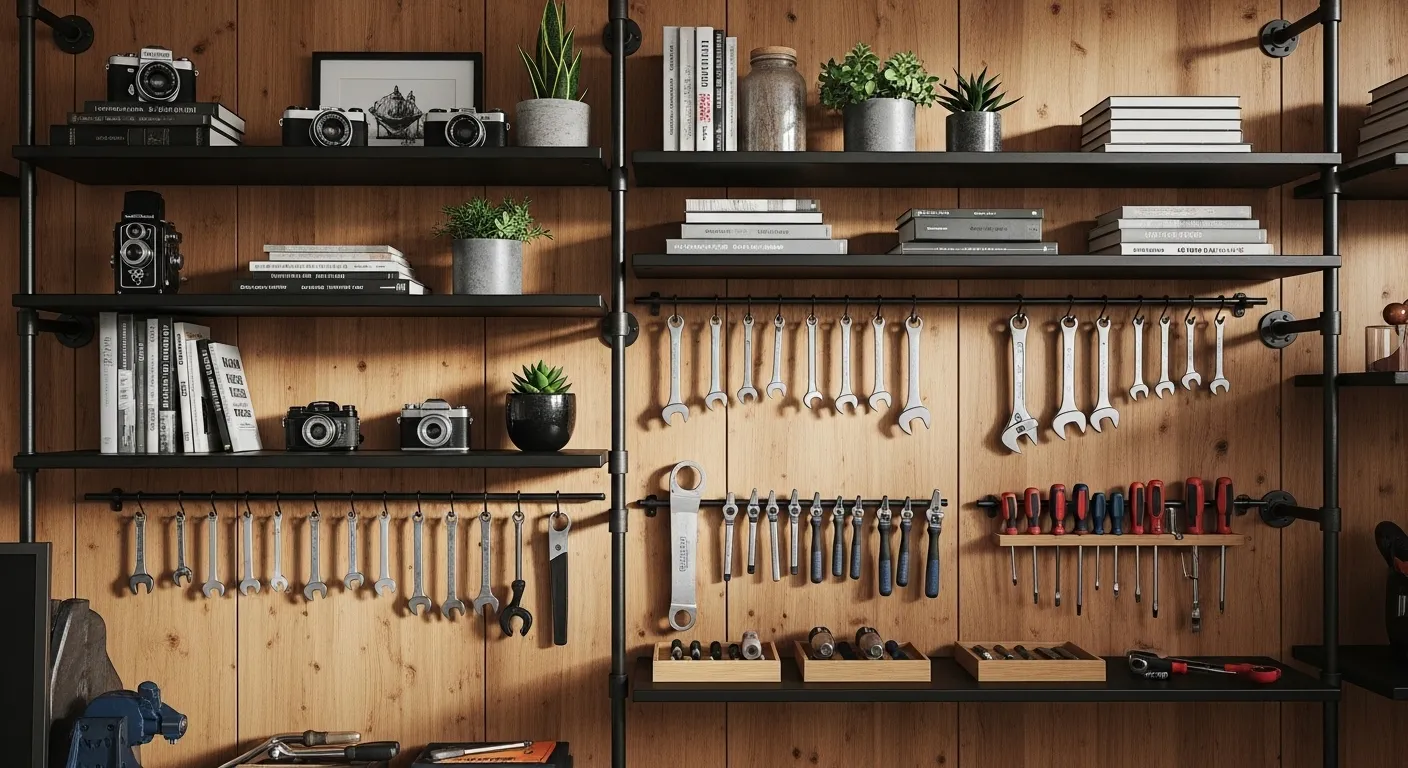
Each material covers the other’s weakness. A solid wood shelf looks warm and takes screws well, but a long, unsupported span will bow under heavy books or dishes. A metal bracket or frame does not bow the same way, and it lets you span farther with a thinner shelf. Metal alone, though, gives you hard edges, cold surfaces, and visible hardware everywhere. The wood face softens that. The practical rule is simple: let metal do the holding and wood do the showing. Brackets, rods, uprights, and frames carry the load. Wood shelves, boxes, and fronts carry the look.
That division also makes repairs easier. If a shelf gets scratched or stained, you can sand and refinish the wood without touching the metalwork. If a bracket loosens, you can tighten or replace one bracket without rebuilding the whole run. Keep the two systems separable on purpose: avoid gluing wood permanently to metal frames, and avoid finishes that weld the two together visually, like painting brackets and shelves the exact same color so you cannot tell where one ends and the other begins. A small contrast between wood tone and metal finish is what makes the pairing read as intentional.
Know Your Wall First
Every wall-storage plan starts with the wall, not the shelf. Drywall over studs, plaster over lath, brick, and concrete block all hold weight differently, and the fixing that works in one can fail in another. Find the studs first with a stud finder, then confirm by tapping and by a small pilot hole where a bracket will cover it. Studs are your best anchor for anything heavy: books, dishes, tools, or a shelf that will be loaded daily.
Where there is no stud, match the fixing to the wall. Toggle bolts suit hollow drywall for medium loads. Masonry anchors suit brick and block. Adhesive strips and small nails suit light decor only, never a loaded shelf. A useful habit is to sort what you plan to store into three load classes before you buy anything: light (framed prints, small plants, empty baskets), medium (a row of books, folded clothes, pantry jars), and heavy (toolboxes, cast iron, full paint cans). Light loads forgive a missed stud. Heavy loads do not. If a shelf will hold heavy items, every bracket should land on a stud or a masonry anchor, with no exceptions.
Also check what is already in the wall. Outlets, switches, and trim tell you where wires run vertically. Pipes usually run near bathrooms and kitchens. Do not drill blind into a wall section you have not checked, and keep shelves clear of thermostat sensors and vent covers. A shelf that blocks a vent or a switch is a daily annoyance you will notice far more than the storage itself.
🛒 Shop This Look:
The Main Systems, Compared
Floating shelves on hidden metal brackets give the cleanest look: the shelf appears to grow out of the wall. They suit display and light-to-medium storage, but they have a real limit — a hidden rod bracket holds less than a visible triangular bracket of the same size, because the leverage works against it. Keep floating spans shorter, and do not load the outer edge heavily.
Pipe shelving uses threaded metal pipe and flanges as uprights and brackets, with wood boards as shelves. It holds more weight than floating shelves, it suits garages and workshops, and it is forgiving to build because the pipe lengths set the spacing. Its limits are cost in fittings, weight of the system itself, and a look that dominates a small room. In a small room, one pipe-shelving wall is a feature; two can feel like a warehouse.
Ladder-style shelves lean against the wall with wood sides and metal rungs or brackets. They need no wall fixing for light loads, which suits renters, but they must still be secured at the top if children or pets can pull on them, and the lean angle eats a few inches of floor space. Wall-mounted crates and boxes give closed storage with an industrial edge, but they hide what is inside, so label them or reserve them for categories you know by position.
French cleats deserve a mention because they combine both materials well: a wood cleat screwed to studs, with matching cleats on boxes, tool holders, and shelves that hang from it. Once the wall cleat is up, you can rearrange everything without new holes. Pegboard with metal hooks is the workshop version of the same idea. It holds hand tools visibly and accessibly, but it looks busy, so reserve it for workspaces rather than living rooms.
Planning the Layout
Measure the wall run first, then decide the shelf lengths. A shelf that runs wall to wall looks built-in; a shelf that stops short of the trim looks placed. Both work, but pick one on purpose and keep it consistent across the run. Height zones matter more than most people expect. Everyday items belong between hip and shoulder height, where you can reach them without a step. Display belongs at eye level. Rarely used items belong high, and heavy items belong low, where a fall does less damage and lifting is safer.
Spacing between shelves should follow what sits on them, not a standard number. Books need a shelf gap taller than the tallest book plus room to pull one out. Jars need room to lift off, not just fit. Leave at least a hand’s width above the tallest item on each shelf, or the shelf will feel crammed even when it is not full. And leave breathing room at the ends: a shelf packed edge to edge reads as clutter, while the same items with a few inches of empty board at each end read as a display.
Plan around the room’s lines. A shelf that crosses a door frame, a window trim, or a light switch at an awkward height will look wrong every day. Sketch the wall on paper, mark the studs, outlets, trim, and furniture below, then draw the shelves. Tape outlines on the wall before drilling: painter’s tape rectangles at the planned shelf positions let you stand back, check the heights from the doorway, and move things before any holes exist.
Choosing Wood and Metal
For shelves, solid pine and oak are the common choices, and plywood with a hardwood edge is a strong, stable alternative that resists warping better than a wide solid board. Reclaimed wood looks the part, but check it: old boards can hide nails, splits, and uneven thickness that make leveling hard. Whatever you choose, check each board for straightness by sighting along its edge, and reject boards with a twist, since a twisted shelf will never sit level on brackets.
For metal, black steel is the default industrial finish. Galvanized steel suits garages and damp rooms because it resists rust. Brass or copper accents warm the look but should be used sparingly, or the room drifts from industrial toward decorative. In damp rooms — bathrooms, laundry rooms, unheated garages — choose coated or galvanized metal and sealed wood, because bare steel rusts and bare wood swells. A clear seal on the wood, especially on end grain, is cheap protection.
Finish compatibility matters. Oil finishes deepen wood color and are easy to refresh. Paint hides grain but covers mismatched boards. If you paint, paint all the wood in the run the same way, or the mismatch will show. Keep metal finishes consistent too: one metal finish per wall, with at most one accent, reads as deliberate. Three different metals on one wall reads as leftover parts.
🛒 Shop This Look:
Hanging It So It Stays Up
Mark everything before drilling: stud positions, bracket positions, and a level line across the wall. A long level, or a laser level if you have one, beats a short level moved along the wall, because small errors compound across a long run. Drill pilot holes for wood screws into studs; the pilot prevents splitting and keeps the screw on line. For masonry, drill with the right bit and set the anchor fully before loading it.
Bracket spacing follows span, not habit. A shelf that spans two brackets sags in the middle if the brackets are too far apart for the load. As a starting point, keep bracket spacing tighter for heavy loads and longer shelves, and add a middle bracket rather than hoping two will do. After hanging, load gradually: place the heaviest items first, near the brackets, not in the middle of the span, and check for sag or pull after a day. If a shelf sags, add a bracket or move weight toward the supports. If a fixing pulls, stop using that shelf until it is re-anchored properly — a pulled fixing only gets worse under load.
Two-point fixing is a safety habit for anything above head height or above a bed, a sofa, or a workbench. Two separate fixings per bracket, or two brackets per shelf at minimum, mean one failure does not drop the shelf. For shelves above beds or seating, prefer studs for every bracket, and avoid glass containers on the highest shelf.
Room by Room
In kitchens, open wood-and-metal shelving suits daily dishes and glasses near the prep area, but it collects grease and dust, so reserve it for items you use often enough to wash regularly. Keep shelves away from direct stove steam where possible. In living rooms, balance display and storage: one shelf of books and objects, one shelf with closed boxes, rather than every shelf open and full.
In garages and workshops, this pairing is at its best. Pegboard or French cleats on one wall, a heavy shelf run on another, and labeled crates for small parts give a workspace where everything is visible and reachable. For more on planning a garage wall, see garage wall storage ideas. In entryways, a short shelf with metal hooks below it handles keys, bags, and hats in one compact station — the shelf holds the small things, the hooks hold the hanging things, and neither needs a large wall.
Mistakes That Ruin the Look
The most common mistake is overfilling: every shelf packed to the edge, with no empty board showing. Industrial storage looks best with some restraint — a full shelf and an emptier shelf next to it. The second mistake is mismatched metals: black brackets, silver screws, and brass hooks on one wall. Pick one metal finish and match the screws to it. The third is shelves too deep for the walkway: a deep shelf in a narrow hall forces everyone to sidestep it. Depth should follow the room — shallow in halls, deeper in garages and kitchens.
Other mistakes are structural: ignoring stud layout and hoping wall plugs will hold heavy loads, spacing brackets by eye instead of measuring, and hanging shelves above radiators or vents where heat dries wood and warps boards. Each is easy to avoid with the measuring and stud-finding steps above, and each is expensive to fix after the holes are drilled.
Care and Upkeep
Open shelves need dusting, and wood-and-metal shelving is no exception. Dust wood with a dry cloth and wipe metal with a damp cloth, drying it right away in damp rooms. Re-oil wood shelves when they start to look dry, especially near windows and heat sources. Once a year, check every bracket for tightness and every shelf for sag, and tighten or re-anchor before a small problem becomes a fallen shelf. Rotate what sits on display shelves occasionally — not for style, but because items left untouched for years hide dust and moisture underneath. A storage wall that is checked once a year will outlast one that is never checked, and it will keep looking like it was planned rather than accumulated.
🛒 Shop This Look: