
Transform an old belt into a stylish floating shelf in just a few steps. This project combines upcycling with practical home storage, creating a shelf that’s both functional and decorative. Perfect for small spaces, it works for books, plants, or decorative items while adding a handmade touch to your walls.
This guide is beginner-friendly and requires minimal tools. By following each step carefully, you can create a unique floating shelf that looks intentional and modern. The belt not only acts as a support but also adds texture and personality to your space.
Materials Needed
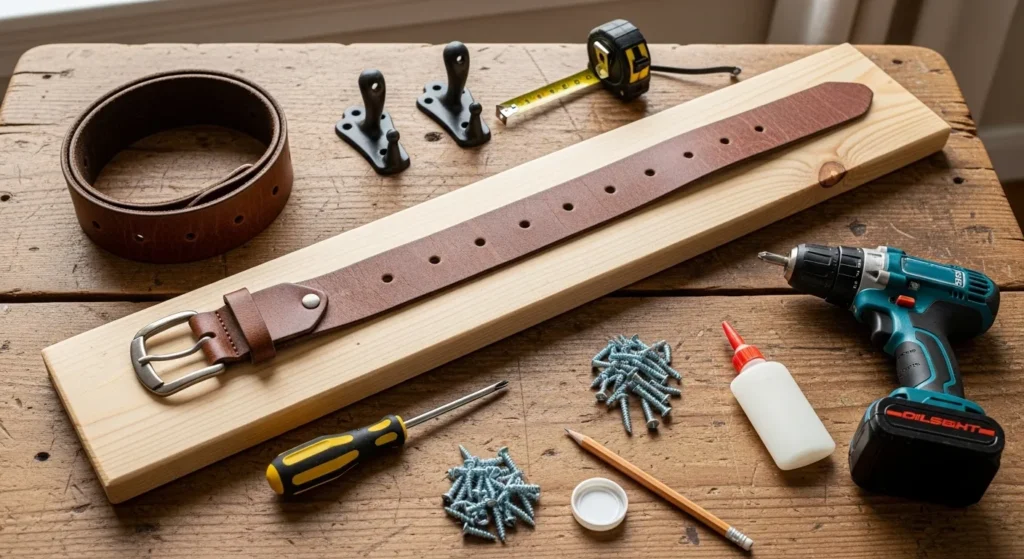
You will need a sturdy old belt, a wooden plank for the shelf, two strong wall hooks, screws, a drill or screwdriver, and optional wall anchors for added stability. Choose a belt thick enough to hold the weight of the shelf and its items, and a plank that fits your intended space.
Clean the wooden plank and belt before starting. Remove any dirt or loose threads from the belt and sand the plank lightly if necessary. Preparing materials ensures a smooth assembly process.
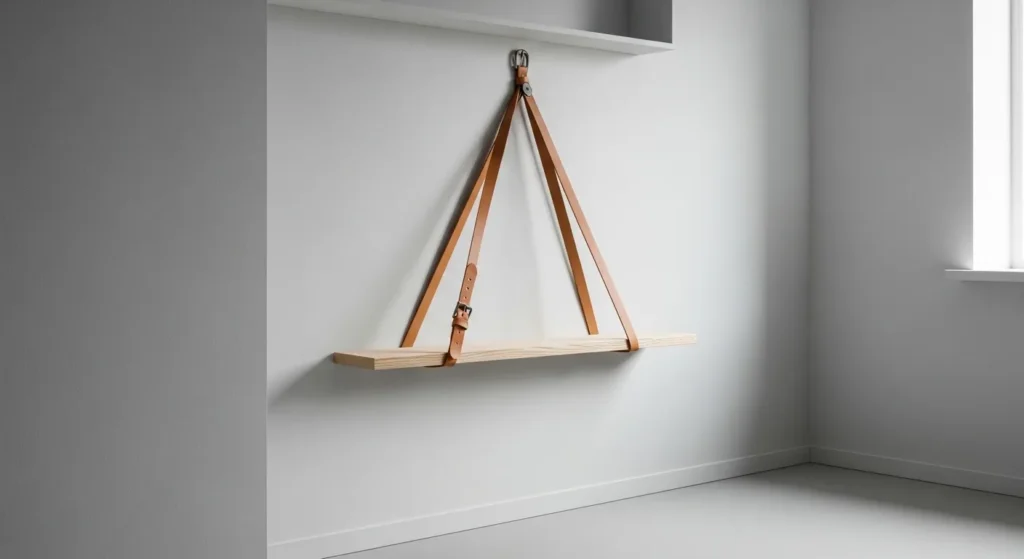
Step 1: Measuring and Marking the Wall

Decide where you want to hang the shelf and measure the desired height. Mark two spots on the wall that match the belt loops or hook placement. Ensure marks are level to prevent a tilted shelf.
Using a spirit level or ruler helps achieve accuracy. Proper marking prevents mistakes during installation and ensures your shelf hangs straight and looks professional.
Step 2: Preparing the Belt
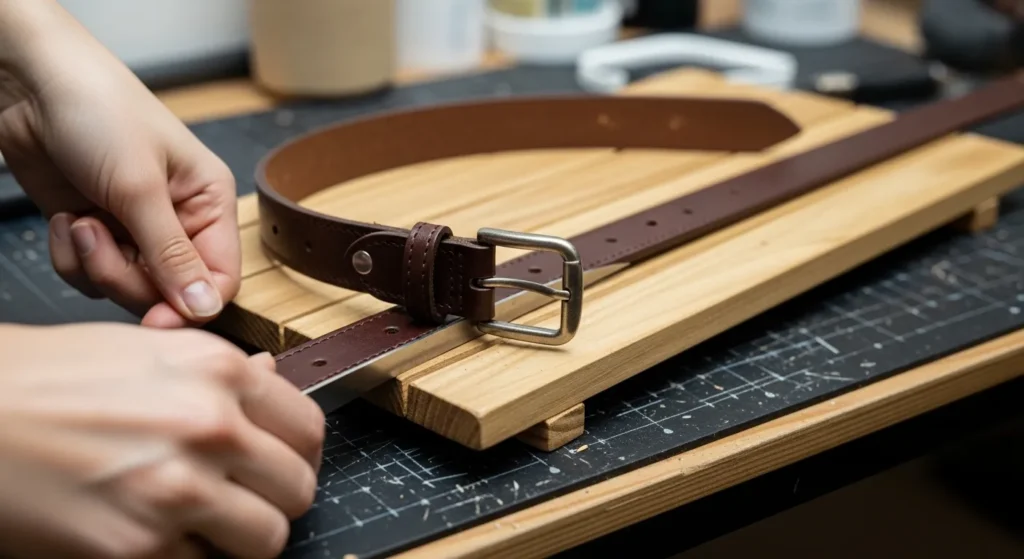
Remove the buckle from the belt and cut it to the desired length if needed. The belt should wrap around the wall hooks securely, holding the shelf without sagging.
Check the belt for weak spots or tears. A strong, intact belt ensures safety and stability. If the belt has holes, ensure they align with the hooks to avoid slipping.
Step 3: Attaching Wall Hooks
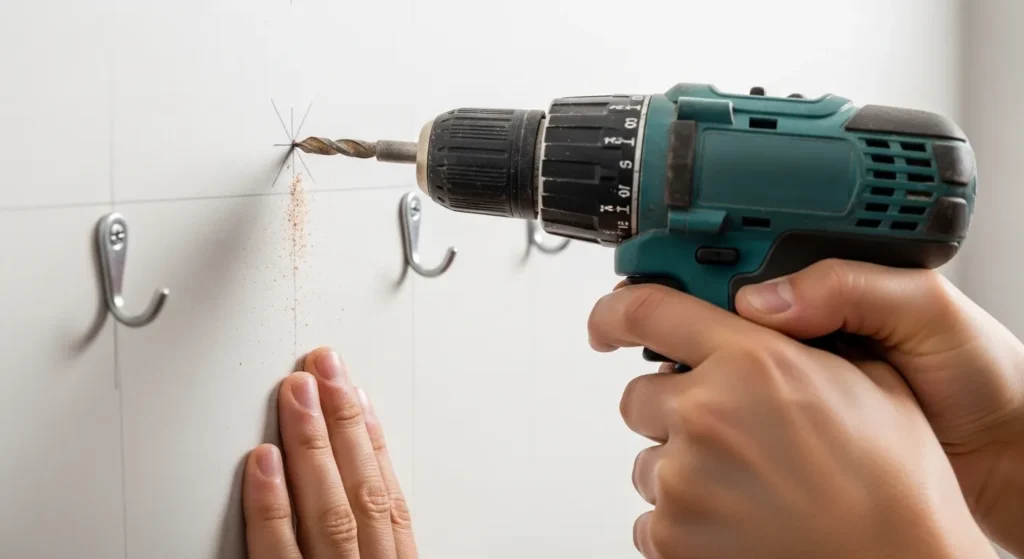
Install two strong wall hooks at the previously marked spots. Use wall anchors if mounting on drywall to ensure they support the shelf’s weight. Screws should be tight and flush with the wall.
Double-check that hooks are level and spaced evenly. Proper hook placement guarantees the shelf hangs straight and reduces the risk of tipping.
Step 4: Securing the Belt
Loop the belt around the wall hooks and adjust the height so the shelf sits level. Tighten the belt as needed to remove any slack while keeping it straight.
Ensure both ends are secured properly on the hooks. A firm, evenly tensioned belt provides reliable support for the shelf and prevents tilting.
Step 5: Placing the Wooden Plank
Slide the wooden plank into the belt loop so it rests securely. Adjust the belt and plank to make sure the shelf is level and stable. The plank should not move or tilt when lightly pressed.
You can use small adhesive pads or rubber grips between the belt and plank for added stability. Check the shelf before placing items on it to ensure it holds weight safely.
Step 6: Securing the Plank (Optional for Extra Stability)
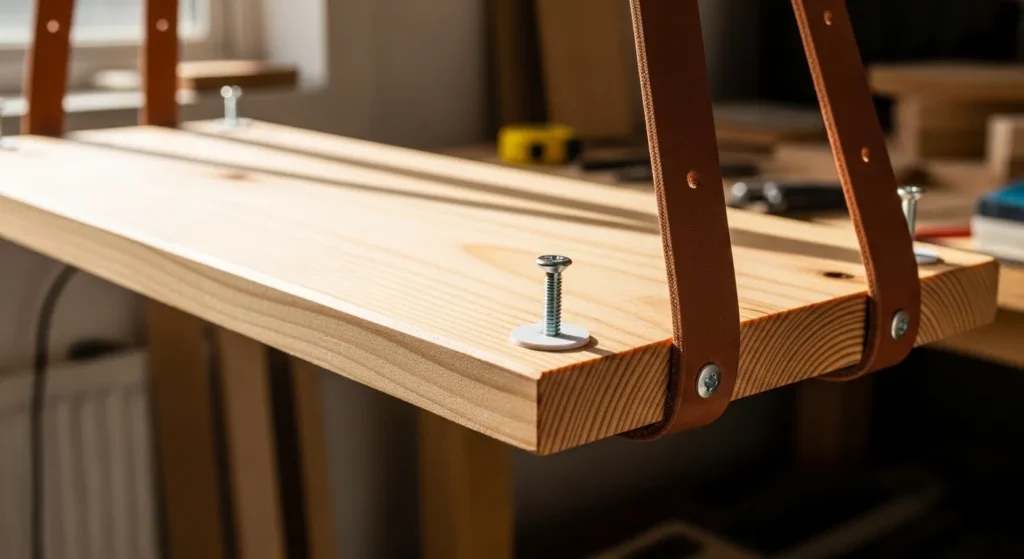
For extra stability, you can fix the plank to the belt using small screws or adhesive pads. This prevents the plank from sliding or tilting over time, especially if you plan to place heavier items like books or decorative objects.
Carefully pre-drill holes if using screws to avoid splitting the wood. If using adhesive pads, place them evenly along the plank’s length. This step ensures your shelf is both functional and long-lasting without compromising the minimalist design.
Step 7: Adjusting Height and Level
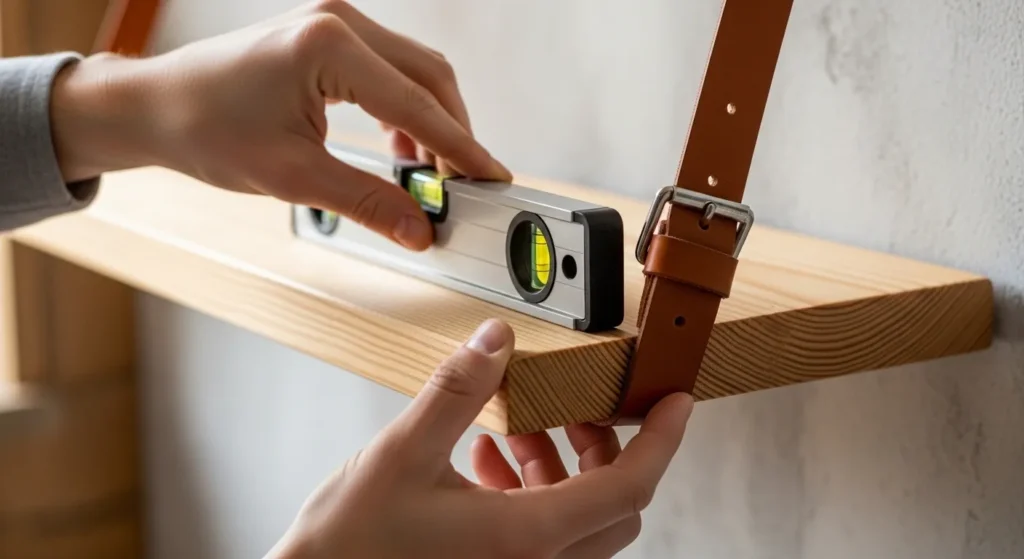
Once the plank is in place, double-check that it is perfectly level using a spirit level. Adjust the belt loops around the hooks as needed to correct any tilt.
Even small adjustments can make a big difference in appearance. Ensuring the shelf is level also prevents items from sliding off and keeps the overall design clean and professional-looking.
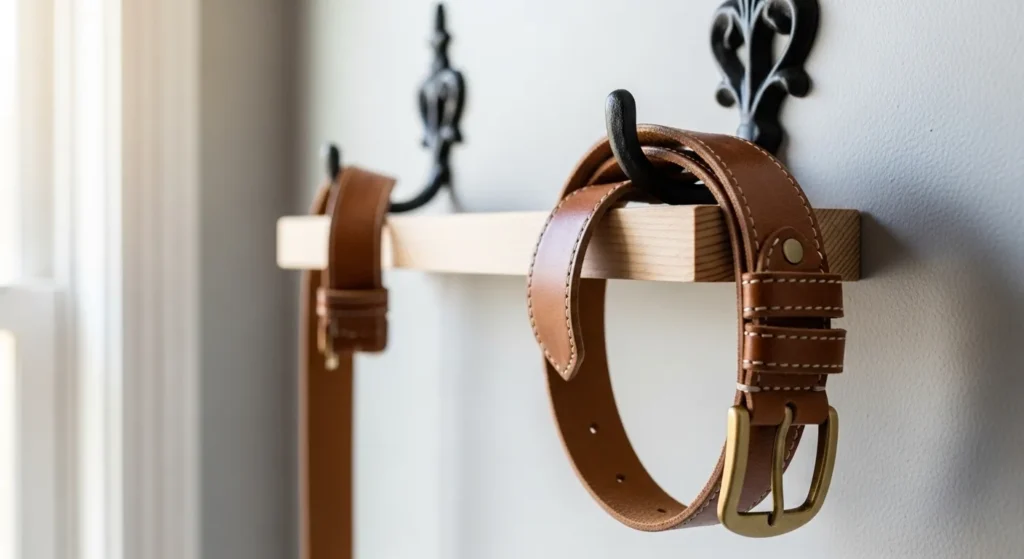
Step 8: Decorating Your Shelf
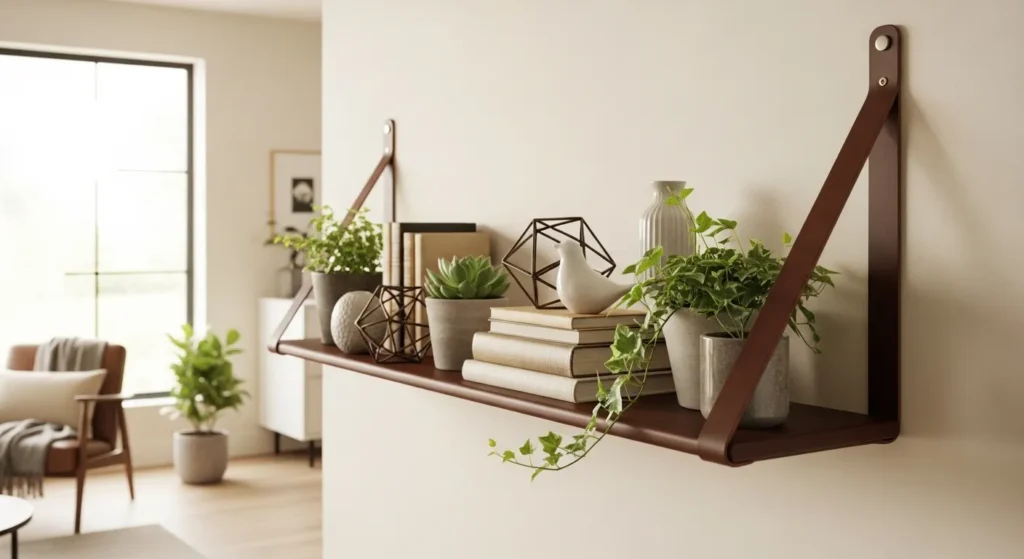
Now your floating shelf is ready for styling. Add small potted plants, books, framed photos, or decorative objects. The natural leather adds a warm, textured look that complements both rustic and modern interiors.
Keep heavier items near the wall side for better balance. Arrange decor thoughtfully to maintain a clean, uncluttered look. This shelf combines functionality with visual appeal, making it a focal point on your wall.
Step 9: Maintenance and Care
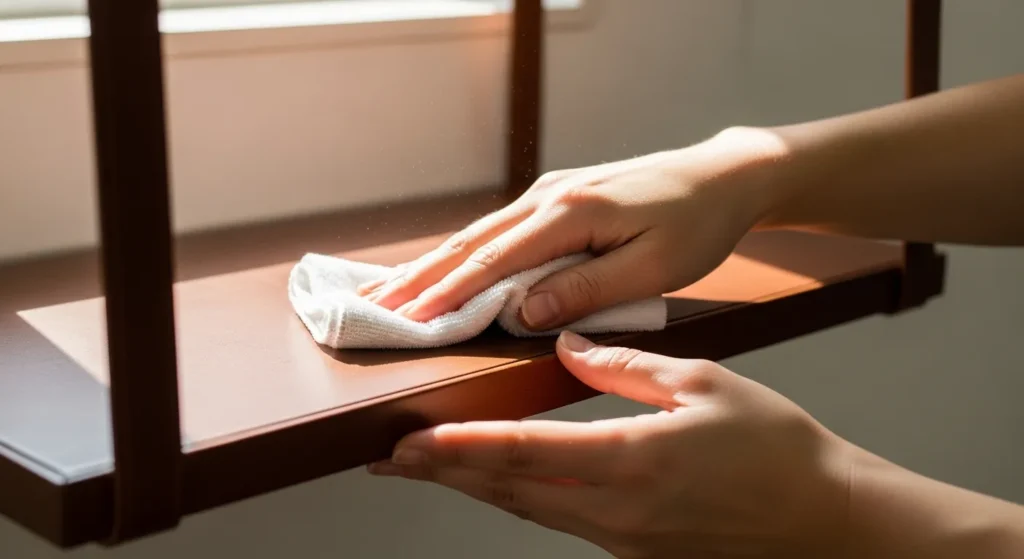
Check the belt and hooks occasionally to ensure the shelf remains secure. Clean the belt and wooden plank with a dry or slightly damp cloth to remove dust. Avoid soaking the leather to preserve its strength and texture.
If the belt shows signs of wear, consider reinforcing it with additional twine or replacing it with a similar sturdy strap. Proper care ensures your shelf stays safe, functional, and attractive for years.
Conclusion
This DIY floating shelf project turns an old belt into a stylish and functional storage solution. It’s cost-effective, beginner-friendly, and adds a creative touch to any room. The combination of wood and leather creates a modern rustic aesthetic while maximizing wall space.
With simple tools and careful steps, anyone can create a floating shelf that’s unique, sturdy, and visually appealing. Whether used for plants, books, or decor, this upcycled belt shelf proves that practical design can be eco-friendly and stylish at the same time.