
As an Amazon Associate, I earn from qualifying purchases. This means I may earn a commission if you purchase through links on this page — at no extra cost to you.
The best studio apartment decorating ideas focus on creating distinct zones without walls: use rugs to define areas, room dividers for privacy, multifunctional furniture, vertical storage, and a cohesive color palette. The goal is making one room feel like several — a bedroom, living area, workspace, and dining spot — without it feeling cramped or chaotic. Related: Create Zones in a Studio Apartment.
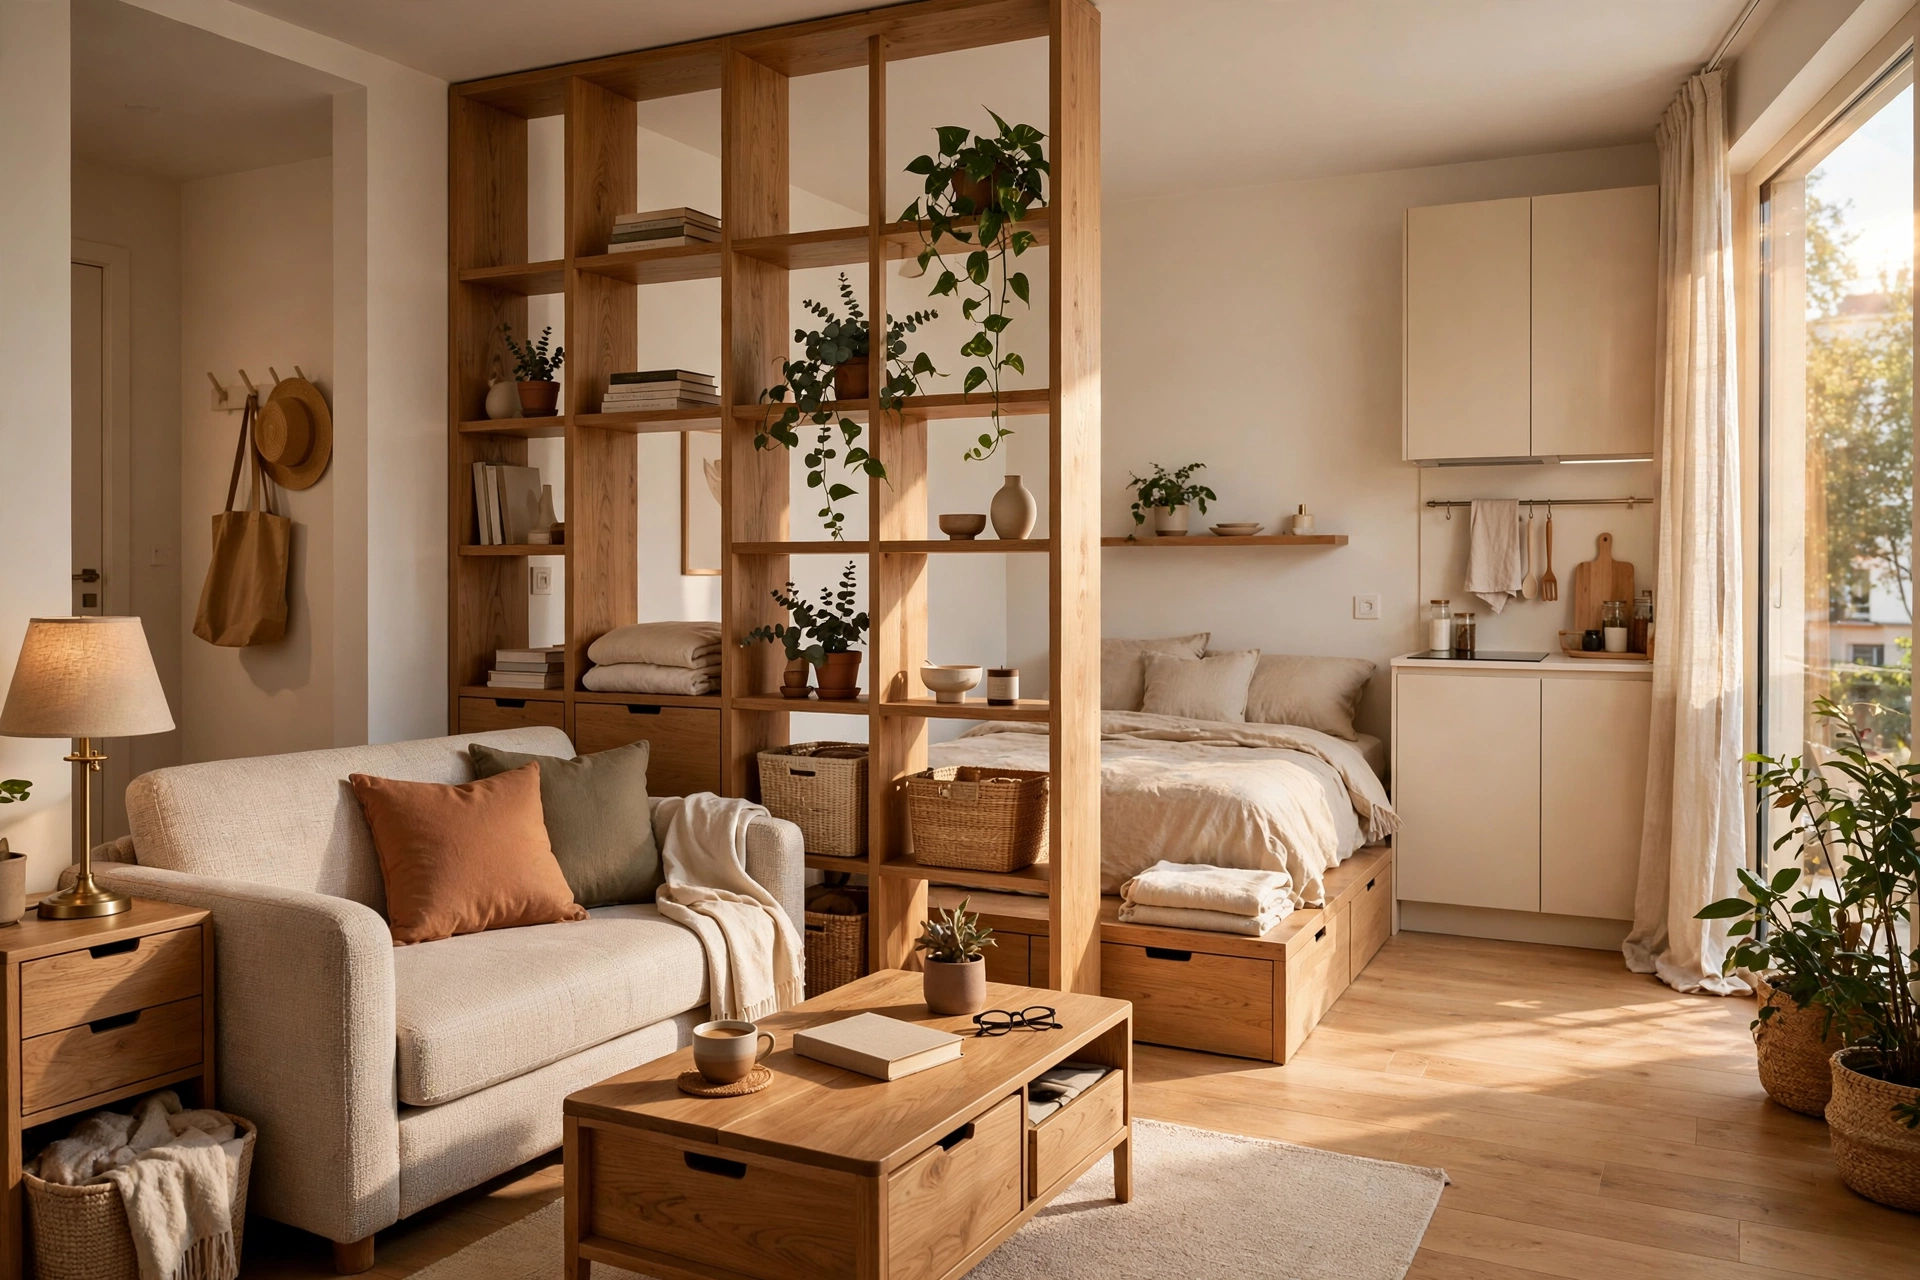
Creating Zones Without Walls
1. Define Areas with Rugs
Different rugs under the bed area, seating area, and dining spot visually separate zones. This is the simplest, most effective zoning trick. The rugs don’t need to match — they need to coordinate through a shared color palette.
2. Use a Room Divider or Open Shelving
A folding screen, curtain on a ceiling track, or open-backed bookshelf creates separation between sleeping and living areas without blocking light. Open shelving is ideal because it divides space while providing storage on both sides.
3. Position Furniture as Dividers
Place the sofa with its back to the bed to create a natural living/sleeping boundary. A console table behind the sofa reinforces the divide and adds surface space. This costs nothing and works immediately.
Sleeping Area Ideas
4. Invest in a Real Bed Frame (Not Just a Mattress)
A proper bed frame with a headboard makes the sleeping area feel intentional rather than temporary. Choose one with built-in storage drawers to maximize function.
5. Create a Bed Nook with Curtains
Ceiling-mounted curtain tracks around the bed create a cozy, private sleeping alcove that closes at night and opens during the day. This is the closest you can get to a separate bedroom without construction.
6. Use a Daybed as a Sofa-Bed Hybrid
A well-styled daybed functions as a sofa during the day and a bed at night, eliminating the need for separate pieces. Add throw pillows and a throw blanket for the sofa look.
Living Area Ideas
7. Choose Apartment-Scale Furniture
A loveseat (48-72 inches) instead of a full sofa. A 36-inch round dining table instead of rectangular. Scale every piece to the room — oversized furniture in a studio feels oppressive.
8. Wall-Mount the TV
Eliminates the need for a media console, freeing up 8-10 square feet. Mount at eye level from the primary seating position.
9. Create a Focal Point
Every zone needs a visual anchor: art above the sofa, a statement headboard, a pendant light over the dining table. Focal points prevent the studio from feeling like one undifferentiated box.
🛒 Shop This Look:
Kitchen & Dining Ideas
10. Use a Drop-Leaf Table
Functions as a dining table for two daily, expands for guests, and folds flat against the wall when you need the space. Can also serve as a desk or extra counter space.
11. Add a Rolling Cart
Extra storage, extra counter space, and a bar cart for entertaining — on wheels so it moves where needed. Tuck it in a corner when not in use.
12. Define the Kitchen with a Rug
A washable runner in the kitchen zone visually separates cooking from living areas, even in an open layout.
Workspace Ideas
13. Carve Out a Dedicated Desk Area
Even a 3-foot wall-mounted desk creates a psychological boundary between “work” and “home.” Position it near a window for natural light and to avoid feeling boxed in.
14. Use Vertical Space for Office Storage
Floating shelves above the desk hold supplies without consuming floor space. A wall-mounted organizer keeps papers visible but tidy.
Storage & Style Ideas
15. Go Up, Not Out
Floor-to-ceiling shelving, over-door organizers, and high-mounted cabinets use vertical space that’s otherwise wasted. In a studio, every vertical inch counts.
16. Maintain a Cohesive Color Palette
Using 3-4 colors throughout the entire studio (rather than different colors per zone) creates visual flow and makes the space feel larger. Vary textures and patterns for interest within the palette.
17. Let in Maximum Light
Use sheer curtains or leave windows bare. Place mirrors opposite windows. Keep window areas clear of tall furniture. Natural light is the single biggest factor in making a studio feel spacious.
18. Edit Ruthlessly
In a studio, every object is visible from everywhere. Adopt a strict one-in-one-out policy. If you can’t find a home for it, it doesn’t belong in a studio apartment.
Studio Layout Principles
Place the bed in the quietest, darkest corner (best for sleep). Position the living area near windows (best for daytime use). Keep the path from door to kitchen clear. Allow at least 30 inches for walkways. These principles work whether your studio is 300 or 600 square feet.
Light It Like Four Rooms
A studio has one ceiling but needs the lighting of four rooms. The trick is giving each zone its own light source at its own height, so the space reads as distinct areas after dark.
🛒 Shop This Look:
- Sleeping zone: Warm, dimmable light — a small table lamp on the nightstand or wall-mounted sconces flanking the bed. Keep it at 2700K and low brightness; this zone should feel like evening even at noon.
- Living zone: A floor lamp with a shade near the sofa for ambient light, plus one accent — a small lamp on a side table or LED candles on a shelf. Two sources at different heights make the seating area feel intentional.
- Work zone: Bright, focused task lighting — a desk lamp with a daylight bulb (4000–5000K) that you switch off when work ends. The on/off ritual helps your brain separate work from home, which is critical when both happen at the same desk.
- Dining/kitchen zone: A pendant or plug-in swag light over the table, hung low (about 30 inches above the tabletop). It defines the dining spot more effectively than any rug.
Put the sleeping and living lights on dimmers or smart bulbs. Being able to drop the bedroom zone to a glow while the living zone stays bright is what makes one room feel like two in the evening.
The Entry Zone You Are Probably Skipping
Most studios open directly into the living space with no transition, which makes the whole apartment feel exposed the moment the door opens. Carve out even a two-foot entry and the psychology of the space changes.
The minimum viable entry: a small washable mat inside the door, two or three wall hooks at staggered heights, and a tiny tray or wall-mounted shelf for keys and sunglasses. That is it — about four square feet that says “you have arrived” instead of “you are standing in the living room.”
If you have six feet: add a narrow console table or floating shelf with a mirror above it. The mirror bounces light, gives you a last look before leaving, and visually doubles the entry depth. A lidded basket underneath corrals shoes without the clutter of a shoe pile.
Building Your 3-Color Palette
The article mentions a cohesive palette — here is how to actually build one. Pick your colors in this order:
- Start with the largest fixed element. Usually the sofa, the bed bedding, or the rug. Its dominant color becomes your 60% neutral. Do not fight fixed elements — coordinate with them.
- Add a secondary color at 30%. Pull it from a secondary tone in that same anchor piece. Curtains, throw pillows, and the desk chair are good carriers.
- Choose one accent at 10%. This is your personality color — the one that appears in art, a plant pot, book spines, one throw. Restraint here is what makes it look designed rather than random.
- Repeat each color at least three times across different zones. A color that appears once looks like an accident; three times looks like a scheme. Your accent might show up in the living-zone throw, a kitchen towel, and bedroom art.
- Test under your actual lighting. Colors shift dramatically between daylight and warm evening lamps. Check fabric swatches and paint chips in the studio at different times of day before committing.
7 Studio Mistakes That Shrink Your Space
- Pushing everything against the walls. It feels logical but creates a hollow middle that emphasizes how small the room is. Pull the sofa even six inches off the wall and float a narrow console behind it — the shadow gap adds perceived depth.
- Too many small rugs. Three tiny rugs chop the floor into fragments. One large rug (or two generously sized zone rugs) unifies the floor and makes it read bigger.
- Blocking the windows. Every inch of window covered by tall furniture is daylight lost. Keep the window wall as clear as possible — low pieces only, and nothing within a foot of the glass.
- One overhead light for the whole space. A single ceiling fixture flattens the room into one zone and casts unflattering shadows. See the lighting section above.
- No vertical storage. Floor space is finite; wall space is not. If your storage sits entirely below waist height, you are wasting half your cubic footage.
- Visual clutter at eye level. Open shelving is great until every shelf is crammed. Leave 20–30% of shelf space empty — negative space is what makes the rest look curated instead of crowded.
- Keeping “someday” items. The bread maker, the extra chairs for parties that never happen, the box of cables. In a studio, every stored-but-unused object is square footage you are paying rent on for nothing.
Where to Spend First: The Priority List
If the budget is tight, spend in this order — each item unlocks the next:
- Sleep quality: a decent mattress and blackout solution for the sleeping zone. Nothing else matters if you are exhausted.
- Lighting: the zone lighting above. Inexpensive lamps transform the space more per dollar than almost anything.
- One large rug: defines the living zone and adds the softness that makes a studio feel like a home rather than a unit.
- Vertical storage: shelving that gets clutter off surfaces and floors.
- The divider: open shelving unit or curtain track for the sleeping zone — privacy is worth paying for.
- Art and textiles: last, because they are the layer that personalizes everything above. Buy these slowly; they are also the easiest to find secondhand.
Studio FAQs
How do I make a studio feel less like one room? Combine three dividers: a rug boundary, a lighting change, and one physical divider (shelving, curtain, or furniture arrangement). One divider reads as decoration; three together read as rooms.
Where should the bed go? The quietest, darkest corner — farthest from the front door and the kitchen. Sleep quality outranks every other layout consideration. If the only dark corner is far from windows, that is fine; bedrooms want darkness anyway.
Can I have guests over comfortably? Yes with the daybed-or-sofa setup and a drop-leaf table. The real secret is a 15-minute reset routine: bed made and styled as a sofa, dishes cleared, one surface wiped. Studios look guest-ready fast because there is so little space to tidy.
How do I handle cooking smells in one room? Always run the range hood, cook with lids on, and ventilate during and after cooking. Keep bedroom textiles away from the kitchen zone, and wash throw pillow covers and curtains regularly — fabrics are what hold onto cooking odors.
Is a studio harder to keep clean? Honestly, yes and no. There is less space to clean, but mess has nowhere to hide — one unwashed dish pile is visible from the bed. The fix is small daily resets rather than weekly deep cleans: five minutes morning and evening keeps a studio perpetually tidy.
🛒 Shop This Look:



