
As an Amazon Associate, I earn from qualifying purchases. This means I may earn a commission if you purchase through links on this page — at no extra cost to you.
By Ella Knight
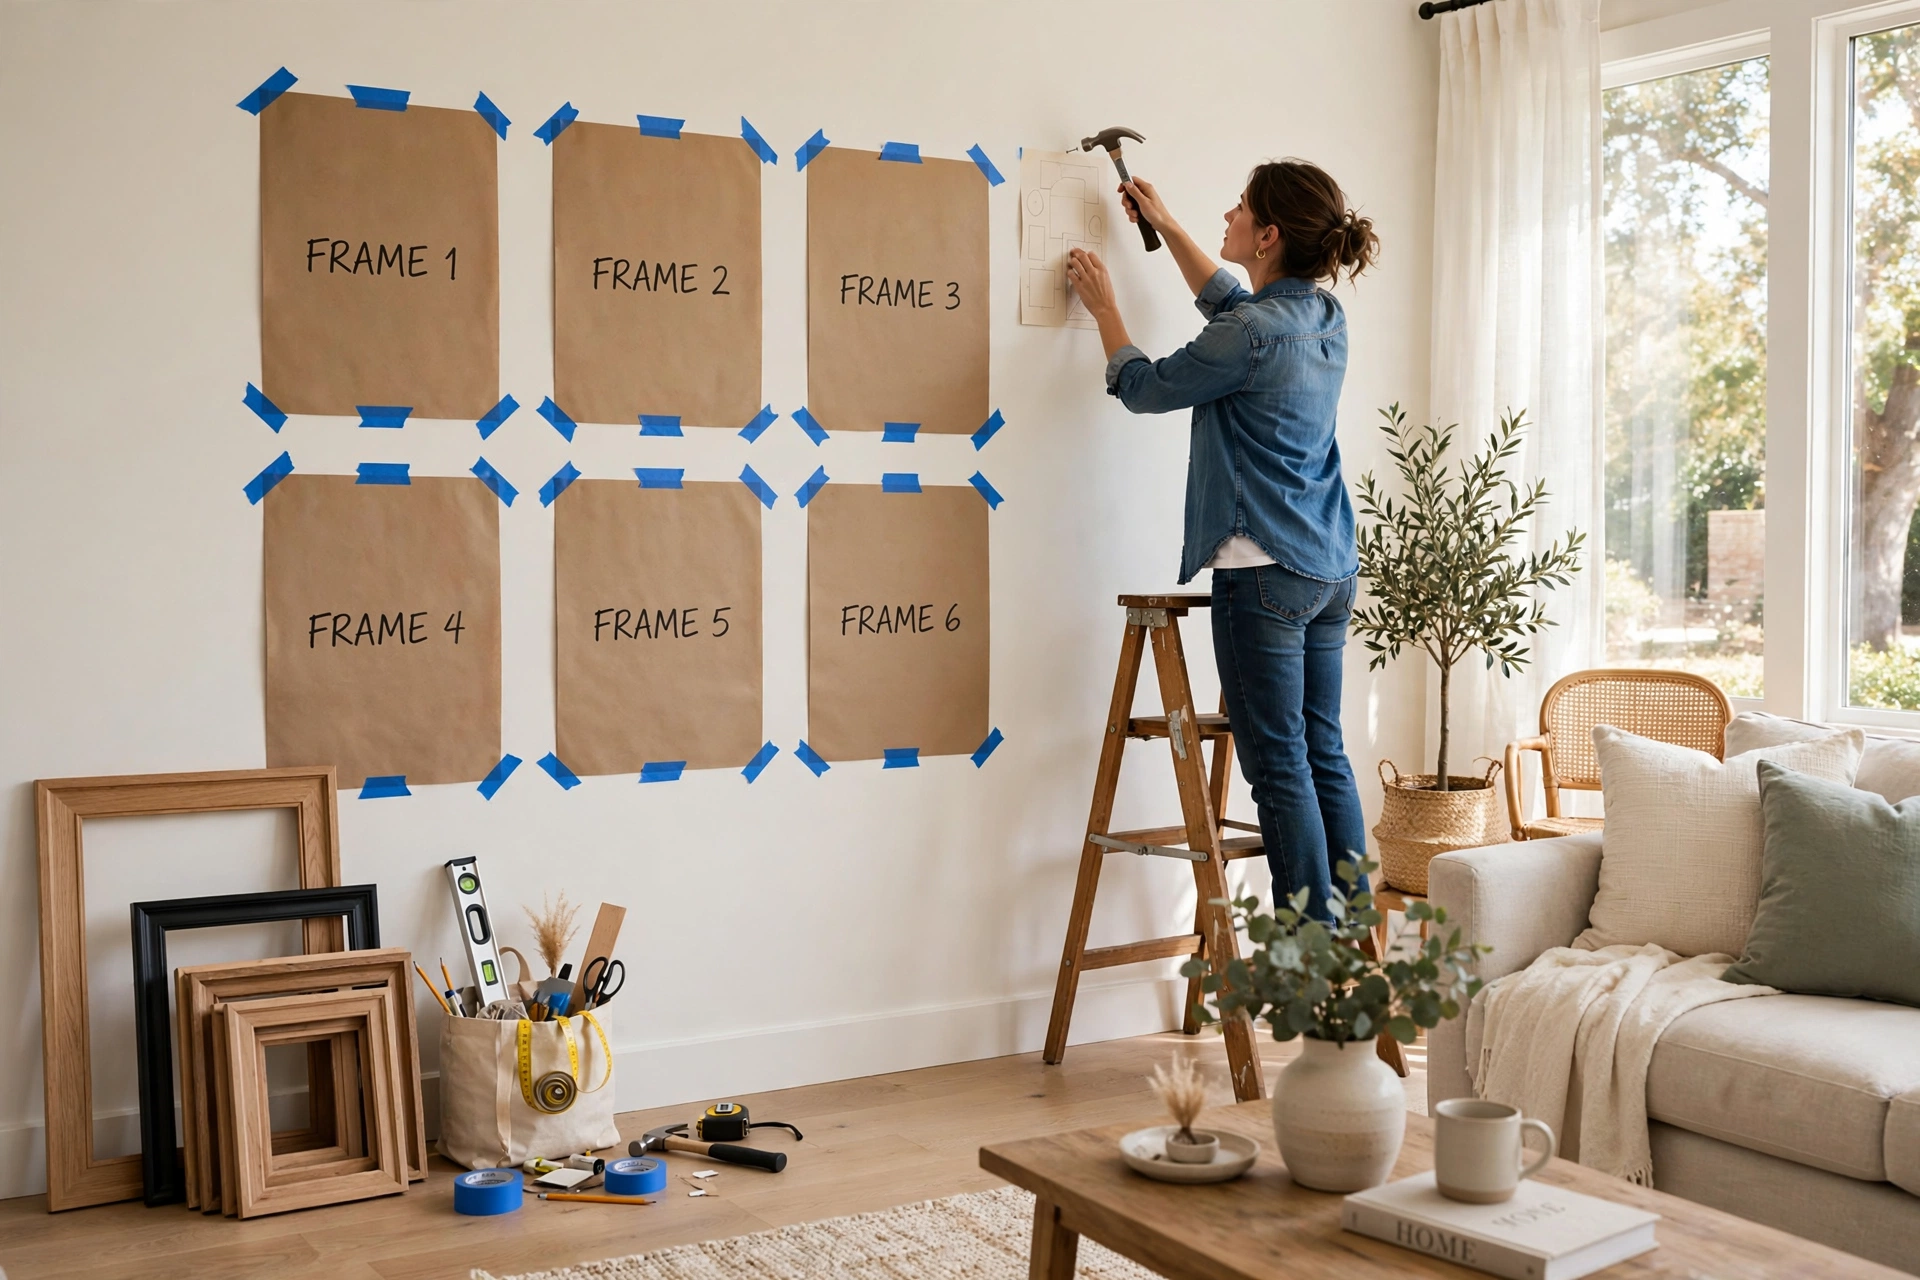
You can hang a gallery wall without measuring by using the paper template method: trace each frame on kraft paper, cut out the shapes, arrange the paper on the wall with painter’s tape until the layout looks right, then nail directly through the paper at the marked hanger points. This eliminates measuring errors and lets you visualize the full arrangement before making any holes. Related: How to Create a Symmetrical Gallery Wall.
Why Skip Measuring?
Measuring every frame position is tedious and error-prone. The template method is faster, more visual, and more forgiving — you can rearrange paper templates endlessly without consequences.
What You Need
- Kraft paper roll (or newspaper taped together)
- Painter’s tape
- Pencil
- Scissors
- Hammer and nails
- Level (just for the first frame)
The Method
1. Trace Every Frame
Lay each frame face-down on kraft paper. Trace the outline. On the paper, mark exactly where the nail needs to go — measure from the top of the frame to the hanger.
2. Cut and Label
Cut out each shape. Write the frame description on the back (“large black,” “small gold”) so you know which is which.
3. Start With Your Anchor
Tape the largest template to the wall first, centered at 57 inches from the floor (gallery standard for center height). Level it.
4. Build Around It
Add templates one by one, eyeballing 2-3 inch gaps. Step back frequently. Rearrange as needed — that’s the beauty of tape.
5. Nail Through the Paper
Once happy, hammer a nail through each template at the marked hanger point. Hang the frame, then gently tear the paper away.
🛒 Shop This Look:
Common Mistakes to Avoid
- Forgetting to mark hanger positions (you’ll have to guess)
- Using regular tape instead of painter’s tape (damages paint)
- Not leveling the first/anchor frame (everything else will be off)
The Cardboard Spacer Trick: Consistent Gaps, Zero Math
The template method gets frames on the wall without measuring positions, but it doesn’t solve gap consistency — eyeballing 2-inch gaps across a dozen frames is where “no measuring” walls go wrong. The fix is a cardboard spacer: cut a strip of cardboard to your desired gap width (2 or 3 inches), and hold it between frames as you position each template. You’re not measuring anything; you’re just matching.
Make two spacers, actually — one for horizontal gaps and one for vertical. They take thirty seconds to cut from any shipping box, and they transform the template stage from guesswork into a quick, repeatable process. Slide the spacer between two paper templates, nudge until it fits snugly, tape, move on. Every gap in the arrangement ends up identical without a single tape-measure reading.
For extra precision on the critical anchor frame, combine the spacer with a simple plumb check: hold your phone’s level app against the template’s edge. Most smartphones have a level in the compass or measure app, and it’s accurate enough for hanging art. Level the anchor, space everything else off it with cardboard, and the whole wall inherits the anchor’s precision.
This trick also solves the “is this gap the same as that gap?” anxiety that makes people reach for the tape measure in the first place. When every gap was set with the same physical object, they’re the same by construction. Trust the spacer.
Hanging on Tricky Walls Without Measuring
The template method assumes standard drywall and nails, but many apartments have walls that laugh at nails — plaster, brick, and concrete. The good news: these walls often pair beautifully with no-measure hanging systems that are actually easier than nails.
For plaster walls, skip the hammers and nails entirely. Plaster cracks and crumbles under impact, turning a simple nail hole into a spiderweb of damage. Instead, use adhesive picture-hanging strips rated for your frame’s weight — they bond to plaster’s smooth surface well and remove cleanly. For heavier pieces, look for plaster-specific picture hooks that distribute pressure, or use the template method with a masonry drill bit and small wall plugs: drill once through the paper template at the marked point, tap in the plug, and drive the screw. The template still eliminates all positioning math.
For brick walls, drilling is the honest answer for anything with real weight — a masonry bit and wall anchors hold securely where adhesives fail on the uneven surface. But for lightweight frames and canvases, brick clips that grip the mortar joints let you hang with zero drilling and zero measuring: clip, hook, done. They only work where mortar joints are recessed enough to grip, so test one before planning a whole wall around them.
For concrete walls, consider skipping wall attachment altogether. Picture rail molding — a narrow trim strip mounted near the ceiling with a few masonry anchors — lets you hang unlimited art from wires and hooks with no further drilling ever. It’s the system museums use, scaled for apartments. One rail installation (a handyman can do it in an hour) gives you a lifetime of rearrangeable, measure-free hanging. Alternatively, lean large frames on furniture and shelves: the most damage-free hanging method is no hanging at all. Related: Can You Hang Wall Art in a Bathroom.
Fixing Mistakes Without a Tape Measure
Even with templates and spacers, frames end up crooked — doors slam, houses settle, and eyeballs lie. Here’s how to fix the common problems with no measuring tools beyond your phone.
🛒 Shop This Look:
Crooked frames: Open your phone’s level app, hold the phone against the frame’s top edge, and nudge until it reads level. For a whole wall that’s drifted, start with the anchor frame — level it first, then adjust the others to match it by eye. The eye judges levelness relatively: if every frame matches the anchor, the wall reads as level even if the anchor is a degree off absolute.
Gaps that drifted: If you spot a gap that’s visibly wider than its neighbors, don’t rehang — just nudge. Most wire-hung frames can shift half an inch on their hooks without coming off. For sawtooth-hung frames, lift the frame off, move the nail with needle-nose pliers (small adjustments only), and rehang. The paper template you saved from installation day shows exactly where everything was supposed to go.
Holes in the wrong spot: It happens. Fill the hole with white toothpaste or spackle, smooth with a damp finger, and touch up with a dab of wall paint if you have it. Toothpaste is a genuine field repair — it dries white, fills small nail holes invisibly on white walls, and buys you time until a proper patch. For larger mistakes, a $5 tube of spackling paste and a putty knife handle anything a nail can do.
The whole arrangement feels “off”: Before rehanging anything, try the photograph test. Take a picture of the wall and study it on your phone — you’ll often find the problem is one frame, usually the smallest or the darkest, sitting in the wrong visual-weight position. Moving a single frame fixes most “off” walls; resist the urge to tear everything down and start over.
Building a No-Measure Hanging Kit
If you hang art more than once a year, assemble a dedicated kit and you’ll never dread the project again. Everything fits in a small toolbox or tote bag, and having it ready removes the biggest barrier to actually hanging the art piled in your closet.
The essentials: a roll of kraft paper (the 12-inch rolls from the paint section are perfect for tracing frames), blue painter’s tape (it removes cleanly for up to two weeks), a pencil, good scissors, a hammer, an assortment of nails and picture-hanging hooks, and two cardboard spacers cut to 2 and 3 inches. Add a small level, or just rely on your phone’s level app.
The upgrades worth having: a laser level that projects horizontal and vertical lines — this single tool makes every hanging job dramatically faster and more accurate, and basic models are inexpensive. A stud finder for heavy pieces. Small felt pads to keep frame bottoms from marking the wall. And a package of adhesive picture-hanging strips in a couple of sizes for frames you don’t want to nail.
The consumables people forget: extra sawtooth hangers and D-rings (thrift-store frames often arrive without hardware), short screws for attaching that hardware, wire for heavy frames that need two-point hanging, and white spackle plus a putty knife for fixing the inevitable mistakes.
Store the kit together and label it. The next time you bring home a new print, you’ll trace, tape, and hang in under an hour instead of spending half the afternoon hunting for a hammer. The template method only feels effortless when the materials are actually on hand — preparation is the real trick behind every “I just eyeballed it” success story.
One final tip: save your paper templates after each project. Fold them into the kit with the frame’s name written on each. When you move or redecorate, you can recreate the exact arrangement in minutes — or hand the templates to a friend who admired your wall. A gallery wall worth copying is the highest compliment.
With the kit assembled and the template method in your hands, the only remaining step is starting. Pick your smallest, least intimidating wall, trace three frames, and hang them this weekend — momentum beats perfection every time.
🛒 Shop This Look:



