
As an Amazon Associate, I earn from qualifying purchases. This means I may earn a commission if you purchase through links on this page — at no extra cost to you.
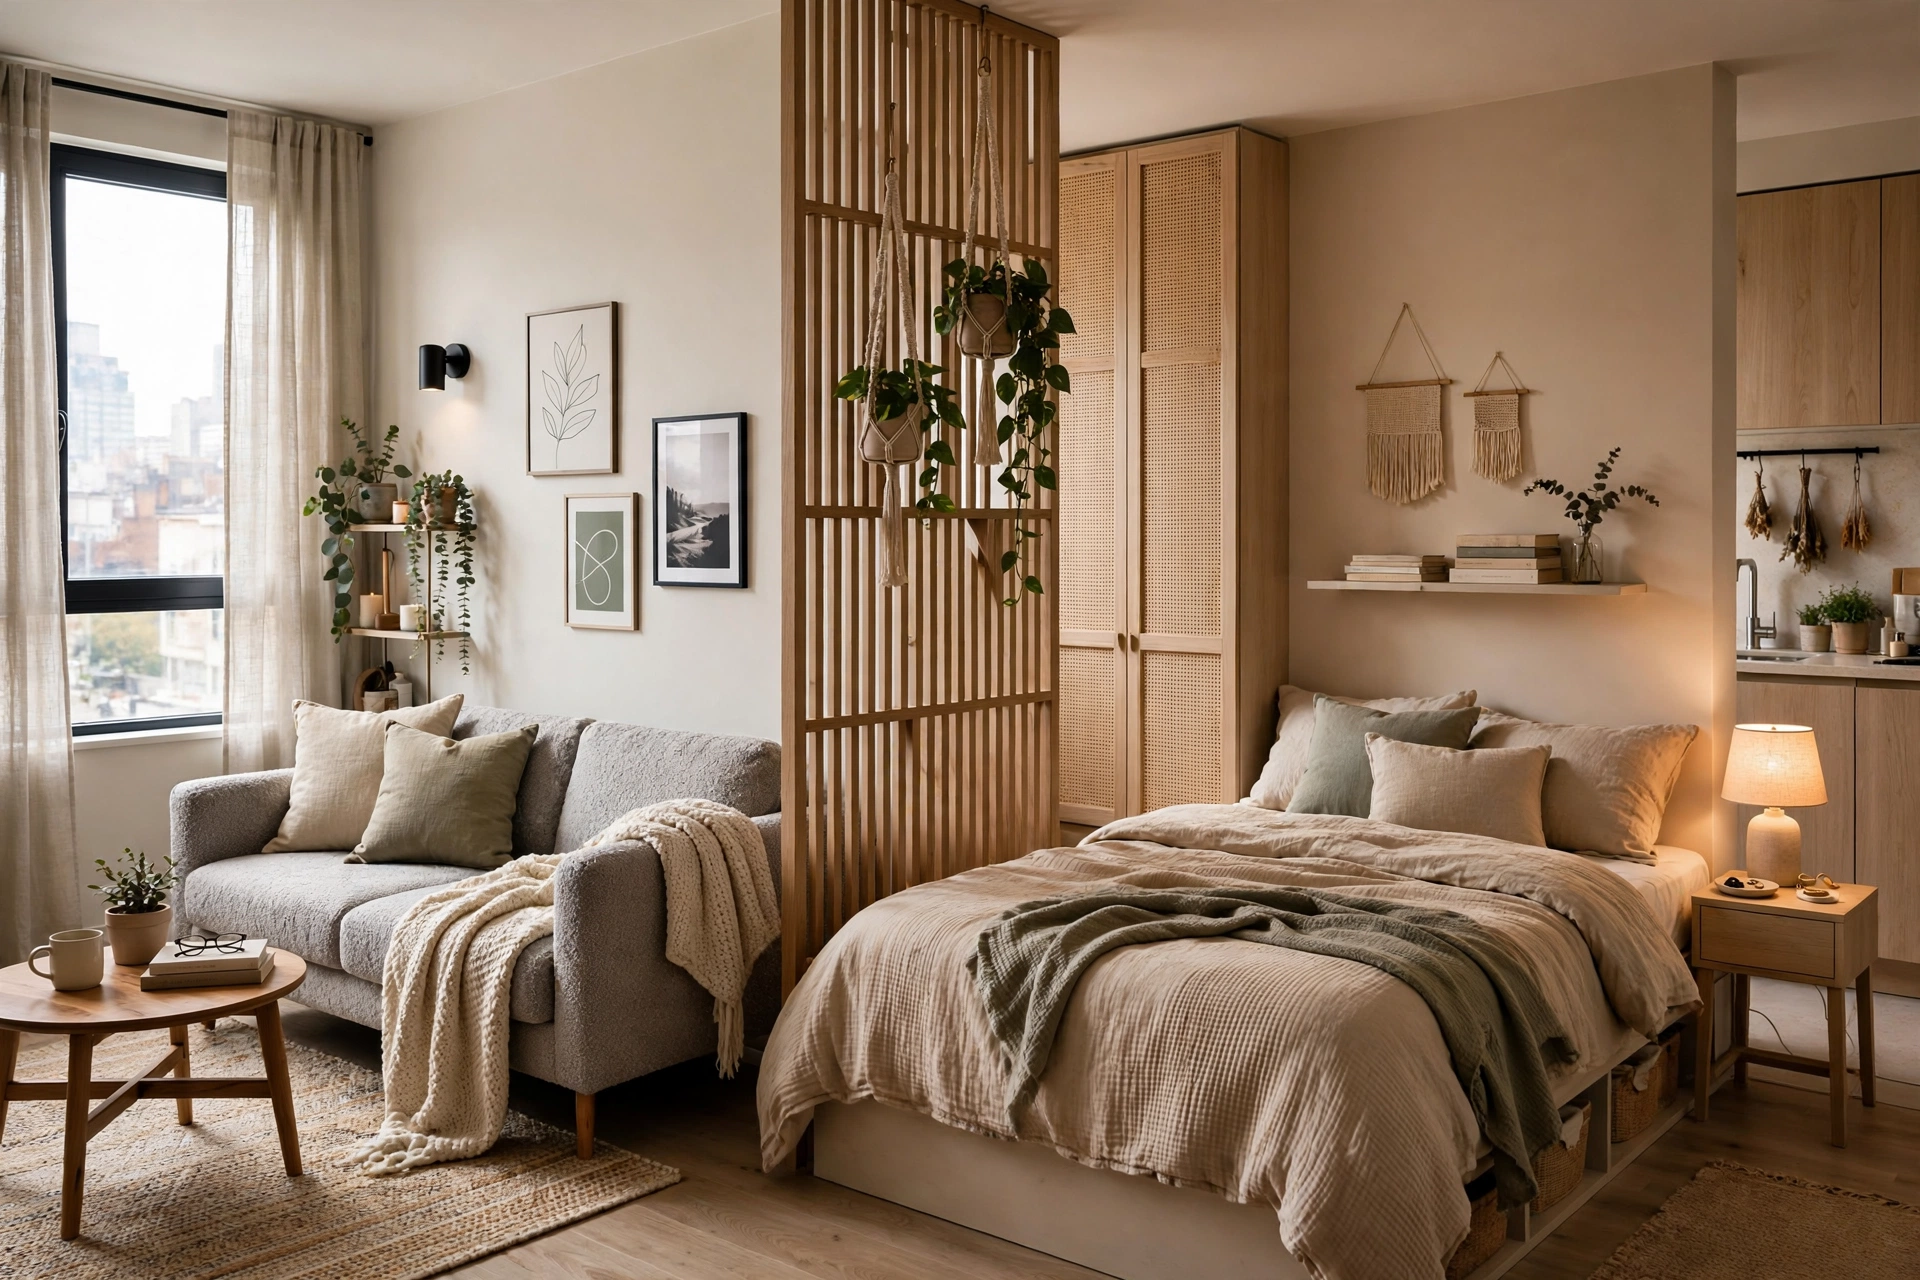
Create zones in a studio using rugs, furniture placement, room dividers, lighting, and color. The goal is distinct living, sleeping, working, and dining areas within one open room — without walls.
4 Zoning Methods
1. Rugs as Boundaries
Different rugs define each zone. The bedroom rug, living rug, and dining rug create visual rooms. Easiest and most effective method.
2. Furniture as Dividers
Place the sofa back-to-bed. Use an open bookshelf perpendicular to walls. A console table behind the sofa marks the living/dining boundary.
3. Physical Dividers
Folding screens, ceiling-track curtains, or open shelving units. Curtains around the bed create a private sleeping nook. Screens fold away when you want openness.
4. Lighting Zones
Different light fixtures per zone: pendant over dining, floor lamp by sofa, sconces by bed. Lighting psychologically separates spaces even in one room.
Zone Planning Tips
Keep the bed in the darkest corner (better sleep). Put living areas near windows (daytime use). Maintain 30-inch walkways between zones. Use a cohesive color palette across all zones for visual flow.
Seven Ways to Divide Without Walls
1. Rugs as Boundaries
The easiest and most effective method. Each zone gets its own rug: the living area rug anchors the sofa and chairs, the bedroom zone gets a softer rug under the bed’s lower two-thirds, the dining or work zone gets a flat-weave that chairs slide on easily. Rules that make it work: leave 12–24 inches of bare floor between rugs so each reads as its own territory, and vary the rugs — same-size matching rugs blur the zones back together. Different patterns in one cohesive palette define zones while keeping the studio unified.
2. Furniture Backs as Walls
Turn the sofa so its back faces the bed — the sofa back becomes a wall between sleeping and living, no partition needed. A low open bookcase placed perpendicular to the room’s long axis divides zones while letting light pass through; style both sides since both are visible. A console table behind the sofa finishes the “wall” and gives the living zone a proper edge when viewed from the bed side.
3. Curtains and Screens
Ceiling-track curtains around the bed create a genuine private sleeping nook — close them at night, open them by day to keep the studio airy. Choose light-filtering fabric, not blackout, unless the curtain also needs to block a roommate’s late-night lamp. Folding screens are the commitment-free version: unfold for privacy or to hide the unmade bed when guests come, fold flat behind furniture when you want openness. A screen with open or slatted sections divides without darkening.
4. Lighting Zones
Light psychologically separates space even when nothing physical does. Give each zone its own source at its own height: a pendant or arc lamp over the living area, a small table lamp or wall sconces by the bed, a focused task lamp at the desk. In the evening, lighting only the zone you are using makes the rest of the studio recede — the lit area feels like its own room.
5. Paint and Color Blocking
A single accent wall behind the bed (in a rental, a large tapestry or peel-and-stick panels) declares “this is the bedroom” more clearly than any furniture arrangement. Alternatively, paint the sleeping nook a slightly deeper tone than the living area — the subtle shift reads as a separate space. Keep the palette related so the studio still flows; you want chapters, not different books.
6. Level Changes and Platforms
A low platform under the bed (even 6–8 inches) with storage drawers beneath creates a distinct sleeping zone and adds drawers a studio desperately needs. The step up is a physical threshold your brain registers as “entering the bedroom.” In rentals, a large rug layered over a slightly raised mat achieves a hint of the same effect without construction.
7. Plants as Soft Dividers
A row of tall plants (fiddle-leaf fig, snake plants in a long planter, a olive tree) forms a living screen between zones. Plants divide without blocking light, add the texture studios often lack, and improve the air. One large plant in a substantial pot anchors a zone boundary better than five small ones scattered around.
Layout Formulas That Work
The Classic Galley Studio
Long and narrow: sleeping zone at the far end (darkest, quietest), living in the middle near the windows, kitchen/dining at the entry end. The progression from public (entry) to private (bed) mirrors how you actually live. A bookcase perpendicular between living and sleeping marks the transition.
The Square Studio
Divide into quadrants: bed in one corner (curtained if possible), living in the opposite corner facing the windows, desk in a third, dining/kitchen in the fourth. Float the sofa with its back to the bed. A round rug in the living quadrant softens the boxy geometry.
The L-Shaped Studio
Treat the L as a gift: the short leg becomes the bedroom (naturally semi-private), the long leg holds living and dining. The inside corner of the L is perfect for the desk — tucked away but not isolated.
Zone-by-Zone Essentials
- Sleeping zone: needs darkness (curtains or an eye mask), quiet (soft furnishings absorb sound), and a real bed frame — a mattress on the floor reads as camping and wrecks the zone’s dignity. A headboard, even a simple upholstered one, declares “bedroom.”
- Living zone: needs the best light and the view. A full-size sofa (not a loveseat, if it fits) makes the studio feel like a home rather than a bedsit. This is where the largest rug and the statement lighting go.
- Work zone: needs daylight and boundaries. Face the desk toward the room, not the wall, so work does not feel like punishment — and so the desk does not become a dumping ground visible from the bed. A desk with closed storage hides work clutter at 6 p.m.
- Dining zone: often merges with the kitchen counter (stools at a peninsula) or the work desk (a table that does both). If separate, a small round table tucks into corners better than a square one.
Mistakes That Make Studios Feel Smaller
- Too many dividers. Every screen, curtain, and bookcase wall costs light and air. Use the minimum that creates the zones — usually two or three moves, not seven.
- Pushing everything to the walls leaves a dead empty middle that emphasizes the room’s smallness. Float the living zone inward on its rug.
- A different style per zone. Four mini-rooms in four styles reads as chaos. One palette, one wood tone, one metal finish across all zones — variety comes from texture and shape, not from competing schemes.
- Blocking the windows with tall dividers or the bed’s headboard. Natural light is a studio’s most valuable asset; every zone should borrow some.
- No clear walkways. Maintain 24–30 inches between zones. When paths are pinched, the whole studio feels like an obstacle course regardless of how pretty the zones are.
Making It Feel Like a Home, Not a Dorm
The difference between a zoned studio and a dorm room is intention in the details: real curtains instead of blinds alone, art hung at proper height in every zone (not just above the sofa), a headboard, matching hangers in the open closet, and lighting with warm bulbs throughout. Studios reward cohesion — when every zone speaks the same design language, the small space reads as a curated home that happens to be one room.
Sound and Privacy: The Invisible Zones
Visual zoning is only half the battle — in a studio, sound travels everywhere, and the lack of acoustic privacy is what makes guests (and roommates) uncomfortable.
- Soft furnishings absorb sound: rugs, curtains, upholstered furniture, and even wall tapestries reduce the echo that makes studios feel harsh. A studio with hard floors and bare walls sounds twice as small as the same space softened.
- The bed zone needs the most quiet: place the bed as far from the entry door and kitchen as possible. A curtain around the bed plus a white-noise machine creates a genuine sleep sanctuary even with a roommate watching TV.
- Work-call privacy: if you take video calls from the studio, position the desk so the background is the styled living zone (not the bed), and use a room divider or curtain behind you. A good microphone matters more than a silent room — but soft furnishings near the desk reduce the echo callers hear.
- Guest comfort: when someone stays over, the zones pay off — the guest gets the living zone (sofa bed or air mattress on the living rug), you keep the curtained bed zone. A folding screen between them preserves everyone’s dignity.
Storage: The Zone Enabler
Zones collapse without storage — when there is nowhere to put things, every zone becomes a storage zone. The studio storage hierarchy:
- Go vertical everywhere: tall narrow bookcases, over-door organizers, wall-mounted desks with hutches. Floor space is the scarcest resource; walls are free.
- Every furniture piece stores: storage ottoman, bed with drawers, coffee table with shelves, console with cabinets. In a studio, single-purpose furniture is a luxury you cannot afford.
- The closed-storage rule: open shelving looks great in photos and chaotic in life. Keep at least 60% of studio storage behind closed doors — visual calm is what makes small spaces livable.
- One landing zone by the door: hooks, a small tray, a shoe spot. Without it, the entry zone (which is also the living zone, the dining zone…) accumulates the drift of daily life.
Living Large in One Room: The Mindset
The studios that feel best are not the ones with the most dividers — they are the ones where every zone earns its keep daily and the whole space flows when zones are not needed. Keep dividers flexible (screens that fold, curtains that open, rugs that define without blocking) so the studio can be one big room for a dinner party and four zones for a workday. The goal was never to make one room feel like four small rooms — it was to make one room work like a whole home.
🛒 Shop This Look:
🛒 Shop This Look:
🛒 Shop This Look:



