
As an Amazon Associate, I earn from qualifying purchases. This means I may earn a commission if you purchase through links on this page — at no extra cost to you.
By Ella Knight
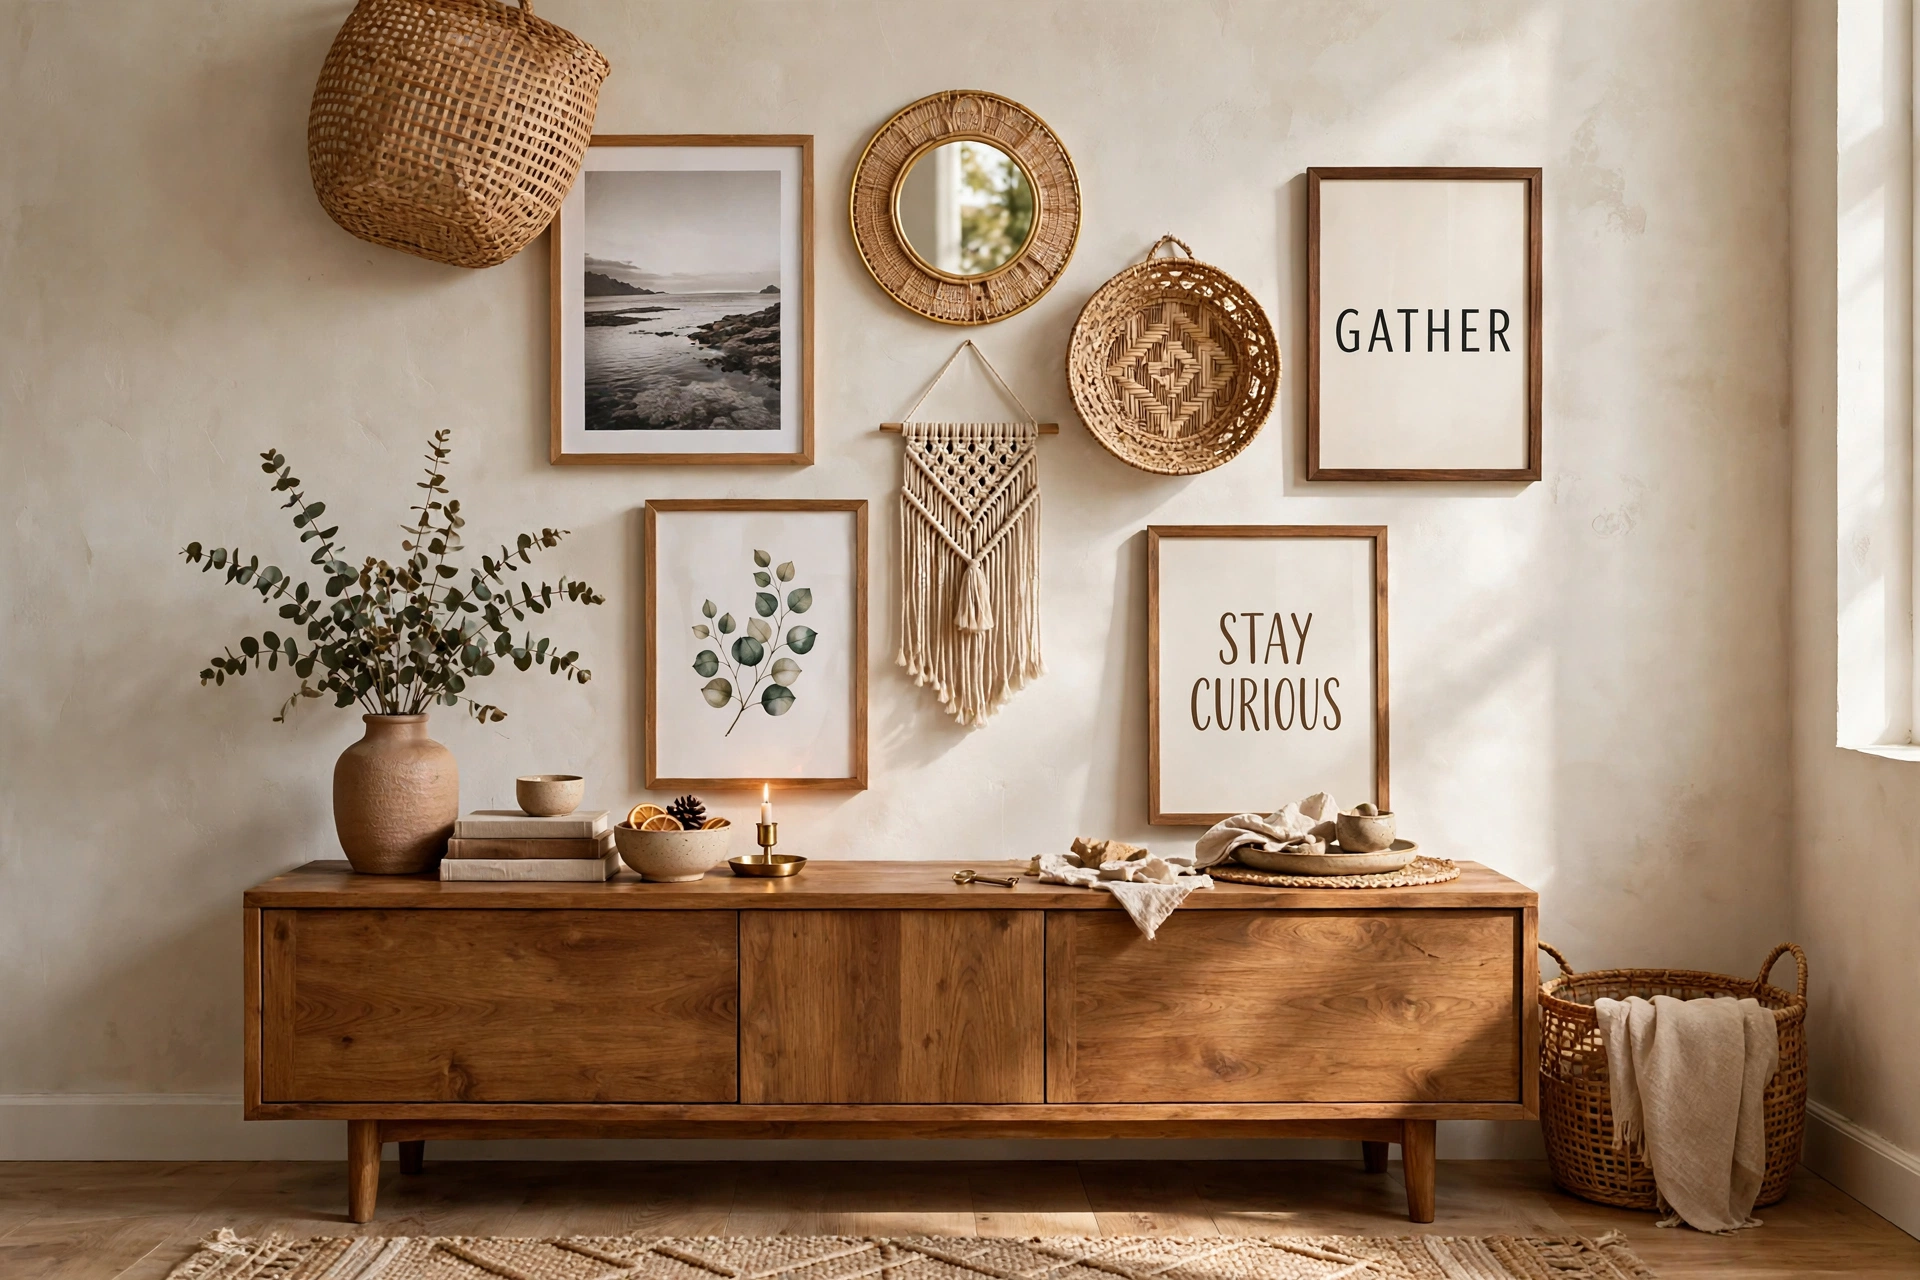
Beyond photos, gallery walls can include art prints, typography posters, mirrors, woven wall hangings, small shelves with objects, vintage plates, hats, musical instruments, maps, postcards, fabric swatches, and even empty frames for visual breathing room. The best non-photo additions add texture and dimension — a flat wall of only framed prints can feel one-dimensional.
12 Non-Photo Ideas
1. Mirrors
A small round mirror breaks up rectangular frames and bounces light around the room.
2. Woven Wall Hangings
Macrame or woven tapestries add soft texture that contrasts beautifully with hard frame edges.
3. Floating Shelves
A small shelf within the gallery holds plants, candles, or sculptural objects.
4. Vintage Plates
Decorative plates (secured with plate hangers) add color and vintage charm.
5. Hats
Straw hats or felt fedoras on simple hooks — unexpectedly chic in bedrooms.
6. Typography Prints
Favorite quotes, single words, or alphabet prints in beautiful fonts.
🛒 Shop This Look:
7. Maps
Vintage maps or modern city prints add a travel-inspired personal touch.
8. Postcards
Collected postcards in small uniform frames tell a travel story.
9. Fabric Swatches
Interesting textiles stretched in embroidery hoops — cheap and textural.
10. Empty Frames
One or two empty frames (just the frame, no art) create intentional negative space.
11. Small Clocks
A decorative wall clock doubles as functional art.
12. Botanical Pressings
Pressed flowers or leaves in float frames — natural and delicate.
Balancing 3D Objects
Limit dimensional objects to 20-30% of your arrangement. Too many protruding items make the wall feel chaotic and collect dust. Place 3D pieces at the edges rather than the center for better balance.
Curating a Cohesive Non-Photo Gallery Wall
A gallery wall of objects lives or dies on cohesion — without it, the wall reads as clutter rather than collection. The most reliable cohesion strategy is a limited color palette: pick two to three colors and make sure nearly every object contains at least one of them. A wall of natural wood, black metal, and cream ceramics looks intentional even with wildly different object types; the same objects in random clashing colors look like a yard sale display. The palette can come from your room — pull it from the rug, the sofa, or the curtains so the wall feels connected to the space.
The second cohesion tool is repetition. Repeated shapes (all round mirrors and plates), repeated materials (all woven pieces, all brass objects), or repeated frames around varied contents create rhythm that the eye reads as design. You don’t need every piece to match — you need enough visual echoes that the variety feels curated. A practical method: gather everything you’re considering on the floor, then remove the two or three pieces that don’t share the palette or a repeated element. Editing is what separates a collection from an accumulation. Finally, give the arrangement a focal point — one larger or more striking piece near the center — so the eye has somewhere to land before wandering across the smaller pieces.
🛒 Shop This Look:
Where to Source Interesting Objects
The best non-photo gallery walls are built from finds, not from a single shopping trip. Thrift stores and flea markets are the prime hunting ground: vintage plates, small mirrors, brass objects, and woven pieces cost a few dollars each and carry the patina that makes a wall feel collected over time. Go with measurements of your wall’s empty spots in your phone so you can buy with intention when you find the right piece.
Your own home is the most overlooked source: hats you actually wear, a beautiful cutting board, a woven basket, a child’s framed drawing, or postcards from trips all make deeply personal gallery wall pieces — and personal beats perfect every time. Nature supplies free art: pressed botanicals, interesting branches, dried grasses in small bud vases hung on the wall, or a striking piece of driftwood. Craft and Etsy sellers fill specific gaps (macramé pieces, small weavings, ceramic wall hangings) when you need a particular size or color. And architectural salvage — old window frames, shutters, corbels, tin ceiling tiles — provides the large anchor pieces that give a wall structure. The hunt is part of the pleasure; a wall assembled over months of finding tells a better story than one ordered in a afternoon.
Hanging 3D Objects Securely
Objects are heavier and more awkward than framed photos, so hanging hardware deserves real thought. Plate hangers (spring-loaded wire grips) are the standard for decorative plates — size them to the plate and test the grip before hanging. Small floating shelves integrated into the arrangement solve the hardest problem: objects with no hanging point (vases, small sculptures, plants) simply sit on the shelf, which itself hangs like a frame. One or two shelves within a gallery wall add dimension and display flexibility.
For hats, adhesive-backed hat hooks or simple nails work — hang from the inner band so the hat keeps its shape. Woven wall hangings and textiles hang best from a slim dowel or branch threaded through the top, suspended by nearly invisible fishing line or twine from a single nail. Mirrors need hardware rated for their actual weight — a heavy vintage mirror deserves a wall anchor or a stud, not a basic nail. General rules: anything over 5 pounds gets a proper anchor; check what’s behind the wall (studs, drywall, plaster) before choosing hardware; and for valuable or irreplaceable objects, use two points of contact rather than one so a single failure doesn’t mean a fall. When in doubt, a small discreet shelf under a precious object is cheap insurance.
Mixing Photos and Objects: The 70/30 Guideline
Pure-object walls are striking, but most people end up mixing photos with objects — and the ratio matters. Around 70% photos/art and 30% objects is the sweet spot: enough objects to add texture and personality, enough flat art to keep the wall visually calm and easy to “read.” Push past 50% objects and the wall starts to feel busy and three-dimensional in a way that can overwhelm a room.
Placement strategy for the mix: use objects as accent punctuation within the photo arrangement — a small mirror or woven piece between framed prints, a shelf with a plant breaking up a row of frames. Distribute objects across the wall rather than clustering them, following the same scatter principle as mixed frame colors. Depth variation is the secret advantage of the mix: objects project 2–6 inches off the wall while frames project under 2 inches, and that dimensional layering catches light and shadow in a way flat walls can’t. Just keep the deepest objects toward the center or bottom of the arrangement where they’re less likely to be bumped, and ensure nothing projects into door swings or tight walkways.
Seasonal and Rotating Gallery Walls: Keeping It Fresh
A gallery wall doesn’t have to be permanent — some of the most delightful ones rotate. The trick is designing for change from the start. Picture ledges (narrow floating shelves) instead of individually hung frames let you swap art seasonally in minutes: lean frames, small objects, and mini canvases on the ledge, restyle for holidays or seasons, no new holes ever. Two or three ledges stacked vertically hold as much as a traditional gallery wall with a fraction of the commitment.
For traditionally hung walls, build in designated rotation spots: 2–3 frames hung with the expectation of changing contents — a kid’s latest artwork, seasonal prints, travel photos from the most recent trip. Use frames that open easily (front-loading or magnetic frames) for these spots so swaps take seconds. Clipboards, clip frames, and wire-and-clip systems are made for rotation — an entire wall of clipboards holding art prints, postcards, and ephemera looks intentionally casual and changes whenever you feel like it. The deeper point: a gallery wall that evolves stays loved. The static wall you perfected in a weekend becomes invisible within months — it’s just background. The wall with this season’s prints, the kids’ new drawings, and the postcard from last month’s trip keeps rewarding attention. Design for the wall you’ll still enjoy in two years, not the photo you’ll take this weekend.
Gallery Wall Lighting: Making Objects Glow
Objects on a gallery wall — unlike flat prints — cast shadows, and lighting determines whether those shadows add drama or just look messy. Picture lights (the brass-bar fixtures mounted above frames) work beautifully for object walls too, washing the arrangement in warm even light that makes textures glow — woven pieces, ceramics, and brass objects all come alive under a picture light. Battery-operated LED versions ($20–$40) eliminate wiring concerns.
Directional track or recessed lighting aimed at the wall from the ceiling creates the gallery effect: position lights roughly 2–3 feet out from the wall, angled at 30 degrees, to minimize harsh shadows while highlighting dimension. Avoid lighting objects straight-on from the front — flat frontal light kills the dimensional quality that makes object walls special. Natural light is the wild card: a gallery wall opposite windows gets beautiful changing light, but direct sun fades textiles, prints, and photographs — use UV-filtering glass on valuable pieces or accept the patina. One often-overlooked move: a small spotlight on a single hero object (a sculptural piece, a striking mask, an architectural fragment) turns it into the wall’s deliberate focal point and makes the whole arrangement feel museum-curated. Light is the cheapest upgrade a gallery wall can get — a $30 picture light transforms a $100 wall into a $500-looking one.
🛒 Shop This Look:



