
As an Amazon Associate, I earn from qualifying purchases. This means I may earn a commission if you purchase through links on this page — at no extra cost to you.
A kitchen that looks expensive is rarely the kitchen where the most money was spent. It is the kitchen where money was spent in the places the eye actually lands, and saved in the places it does not. Cabinets, hardware, lighting, and a few square feet of backsplash do far more work than a full remodel, and they cost a fraction of it. This guide works through the upgrades in the order that gives the most visible return, so you can plan a kitchen refresh that looks considered rather than patched together.
Where money actually shows
Stand in your kitchen doorway and notice what your eye lands on first. It is almost never the inside of a cabinet or the floor under the table. It is the cabinet fronts, the hardware, the lighting, the backsplash, and the general sense of order. Those are the places to spend. The places to save are the things nobody sees: cabinet interiors, the sides of cabinets that face a wall, and anything behind closed doors. A refresh that concentrates on the visible surfaces will read as a new kitchen to anyone walking in, even when the layout and the appliances have not changed at all.
Before spending anything, do the free work first. Empty the counters completely, clean every surface, and put back only what you use daily. A clear counter with a few intentional objects looks more expensive than a crowded counter with new accessories, and it costs nothing. Fix anything broken or wobbly, because a loose handle or a sticking drawer undermines every other upgrade. Then photograph the kitchen in daylight and look at the photograph rather than the room: the camera shows clutter and mismatches more honestly than your eyes do after years of living with them.
Paint cabinets instead of replacing them
Cabinets are the largest visible surface in most kitchens, and painting them is the single highest-return upgrade available. The difference between a professional-looking paint job and a disappointing one is almost entirely preparation. Doors and drawer fronts should come off, hardware should be removed, surfaces should be cleaned of grease, lightly sanded, and primed with a primer suited to the cabinet material. Skipping the cleaning step is the most common reason cabinet paint peels, because kitchen grease prevents adhesion even under a good primer.
Color choice matters more than brand. Light, warm neutrals make a small kitchen feel larger and brighter, while a deep color on lower cabinets with light uppers gives a fitted, intentional look without darkening the room. Test the color on a door you can hold up in the kitchen at different times of day, because kitchen light changes dramatically from morning to evening and a color that looks calm in daylight can turn cold under evening lighting. Use a paint made for cabinets or trim, applied in thin coats, and allow full drying time between coats. Rushing the drying is the second most common reason cabinet paint fails, after skipping the cleaning.
Hardware: the small swap with a big effect
Swapping cabinet hardware is fast, cheap, and disproportionately effective, because handles and knobs are touched every day and seen at eye level throughout the room. The key is consistency: one finish and one style across the kitchen reads as intentional, while a mix of finishes reads as accumulated. If your existing holes do not match the new hardware, a simple jig or template keeps drilling accurate, and a dab of wood filler handles old holes that fall outside the new footprint.
Size matters too. Handles that are too small for wide drawers look lost, and handles that are too large for small doors look clumsy. A good rule of thumb is that a drawer pull should span roughly a third of the drawer’s width, though this is guidance rather than a law, and the eye is the final judge. Hold the new hardware against the door before fixing it, and check it from across the room as well as up close. Matte black, brushed brass, and brushed nickel all work in most kitchens; the right one is the one that already appears elsewhere in the room, in the faucet, the lighting, or the appliances, so the kitchen feels coordinated rather than decorated one piece at a time.
🛒 Shop This Look:
Lighting: the upgrade that changes everything
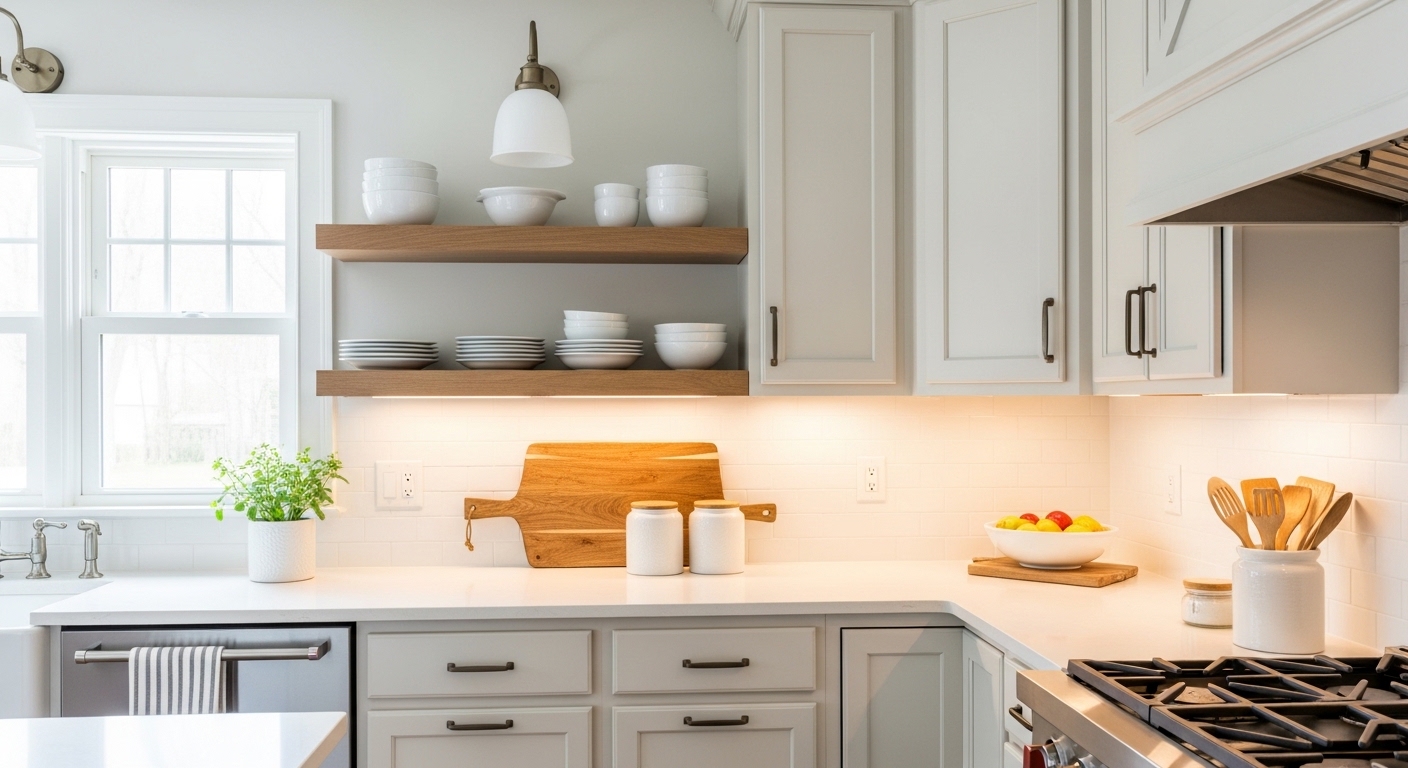
Lighting transforms a kitchen more than almost any other single change, because it changes how every other surface looks. Start with the work areas: under-cabinet lighting over the counters removes the shadows that make a kitchen feel gloomy, and it makes food preparation genuinely easier. A simple LED strip under the wall cabinets is inexpensive, easy to fit, and effective, and it makes the kitchen look finished at night even when nothing else has changed.
Next, look at the main ceiling light. A single central fixture often leaves the counters in shadow, because the cook stands between the light and the work surface. Adding a pendant over an island or a table, or a second light over the sink, balances the room and gives it focal points. Warm light suits most kitchens, because it flatters wood, food, and skin tones, while very cool light can make a kitchen feel like a workshop. If your kitchen has a dimmer, use it: a kitchen that can be bright for cooking and soft for eating feels like two rooms for the price of one.
Backsplash without the remodel price
A backsplash covers a small area but sits right at eye level, which is why changing it has such a large effect. Peel-and-stick tiles have improved greatly, and they are a genuine option for a budget refresh, provided the wall behind them is clean, smooth, and dry. They work best in areas that do not take direct, sustained heat or constant splashing, so the wall behind the stove deserves more caution than the wall beside the sink. For a more permanent result, a single row of real tile as an accent, or a painted backsplash panel in a durable, washable paint, can give the same visual lift for less than a full re-tile.
Color and pattern should be calmer than you think. A backsplash is a background, not the star of the room, and a quiet tile or a soft color lets the cabinets and counters do the talking. If the rest of the kitchen is plain, a patterned tile can be the one lively element; if the kitchen already has strong colors or busy counters, a plain backsplash keeps the room from feeling chaotic. Grout color matters too: a grout close to the tile color makes the surface look seamless and calm, while a contrasting grout makes every tile edge stand out.
Counters without replacement
Replacing countertops is usually the most expensive single item in a kitchen refresh, and it is often unnecessary. A laminate counter in good structural condition can be improved with a thorough clean, a repair of any chips or burns, and a new edge trim if the old one is damaged. A butcher-block section, fitted as a cutting area rather than a full replacement, adds warmth and a practical work surface for far less than new counters throughout. A stone-look overlay or a professionally applied resurfacing coating is another option, though its durability depends heavily on the installer and the existing surface, so check references before committing.
If the counter is genuinely damaged or stained beyond repair, replacing only the most visible run, usually the run beside the stove or the island, and keeping the rest, can still transform the room, provided the new material coordinates with the old. A sudden change of counter material mid-kitchen looks like a repair; a deliberate contrast, such as a wood island top against stone perimeter counters, looks like a design choice. The difference is whether the contrast was planned and repeated elsewhere, for example in a wooden shelf or a cutting board that echoes the island top.
Open shelving and the walls
Removing the doors from one or two wall cabinets, or replacing one cabinet run with open shelves, opens up a kitchen visually and costs almost nothing. It only works if what sits on the shelves is attractive and used often enough to stay clean, because open shelves display everything, including dust and grease. Choose one cabinet, ideally away from the stove where grease is heaviest, and keep the shelves for everyday dishes, glasses, and a plant, not for the rarely used items that belong behind a door.
Walls are the other cheap surface. A fresh coat of paint on the kitchen walls, in a color that coordinates with the cabinets, makes the whole room feel cleaner and more intentional. Neutral walls act as a backdrop for other upgrades like metallic fixtures or bold rugs, letting those pieces stand out instead of competing with a busy wall color. If the walls are in good condition, paint alone, with the trim touched up at the same time, can make a kitchen feel refreshed before any other work begins. Keep wall decor minimal in a small kitchen: one or two pieces with room around them will look more expensive than a crowded gallery wall, and kitchen wall decor ideas show treatments that suit a working kitchen wall.
🛒 Shop This Look:
Floors, appliances, and fixtures
Floors are expensive to replace and rarely the first thing the eye notices, so they are usually the wrong place to spend a small budget. A deep clean, a repair of damaged boards or tiles, and a good rug in the main work zone will improve a floor’s appearance for very little. If the floor is genuinely worn, a rug runner along the main work run draws the eye along the room and covers the worst of it, while also making standing at the counter more comfortable.
Appliances should be cleaned and, where possible, made consistent, because a row of appliances in different finishes reads as accumulated rather than planned. A stainless-steel cleaner, a new handle, or a panel that matches the cabinets can unify an appliance without replacing it. Fixtures follow the same rule as hardware: a new faucet in the same finish as the cabinet hardware ties the room together, and it is a job most confident homeowners can do in an afternoon, provided the water is isolated first and the connections are checked for leaks before the cabinet is closed up again.
Small kitchens and rented kitchens
Small kitchens benefit most from a budget refresh, because every change is visible and the quantities are small. Paint, hardware, and lighting will transform a small kitchen faster than any other room in the house, and the cost stays low because there is simply less of everything. Focus on light and order: pale cabinet colors, clear counters, and good under-cabinet lighting make a small kitchen feel larger without moving a single wall.
Renters can do most of this without permanent changes. Peel-and-stick backsplash tiles, adhesive hooks, a freestanding shelf, a new faucet aerator, and a rug are all removable, and cabinet hardware can usually be swapped and swapped back, provided the original hardware is kept and the holes are not altered. Check the tenancy agreement before painting, and if painting is not allowed, concentrate on the removable upgrades, which still make a real difference. When moving out, anything adhesive should be tested on a hidden area first, because removal from paint can take the paint with it.
Mistakes that make a budget refresh look cheap
The most common mistake is doing too many small things in different styles, so the kitchen ends up looking patched rather than planned. One finish for hardware, one color family for paint, and one style of lighting will always beat a collection of bargains that do not relate to each other. The second mistake is skipping preparation, especially on cabinets, where uncleaned grease or rushed drying will undo an otherwise good paint job within months. The third is spending on decoration before fixing what is broken: a new rug cannot rescue a sticking drawer, and a new light cannot rescue a stained counter that should have been repaired first.
The fourth mistake is copying a showroom kitchen instead of working with the kitchen you have. A dark, dramatic kitchen in a photograph may have far more natural light than yours, and a pale, airy kitchen may have a larger window. Work with your room’s light, size, and layout, and choose upgrades that suit those realities. A kitchen that suits its own room will always look more expensive than a kitchen that imitates someone else’s.
🛒 Shop This Look:
A starter plan in order
Work in this order and the budget will go furthest. First, clear the counters, clean everything, and fix what is broken. Second, paint the walls and touch up the trim. Third, paint the cabinets if they need it, with full preparation and drying time. Fourth, swap the hardware to one consistent finish. Fifth, improve the lighting, starting under the cabinets. Sixth, refresh the backsplash. Seventh, repair or improve the counters. Eighth, add the finishing touches: a rug, a plant, and one or two pieces of wall decor with room around them. Stop at any point and the kitchen will still look better than when you started, because each step stands on its own rather than depending on the next one. For the rest of the kitchen, the kitchen ideas hub collects further planning guides by room and job.