
As an Amazon Associate, I earn from qualifying purchases. This means I may earn a commission if you purchase through links on this page — at no extra cost to you.
A well-decorated kitchen balances function and beauty. The best kitchen decor serves a purpose — cutting boards that are also display pieces, open shelving that’s both storage and styling, lighting that’s both task and ambient. This guide covers countertop styling, small kitchen solutions, budget upgrades, and the design principles that make kitchens feel intentional rather than cluttered.
Countertop Styling: The 5-Formula Approach
Countertops are the most visible surface in your kitchen. The goal is styled but functional — every item should earn its counter space.
Formula 1: The Cutting Board Lean
Lean 2–3 wooden cutting boards against the backsplash. Vary sizes and wood tones. This adds warmth, height, and texture. It’s also practical — grab one when you need it.
Formula 2: The Tray Corral
Place a tray on the counter, then arrange 3–4 items on it (olive oil, salt cellar, small plant). The tray contains visual clutter and makes the grouping feel intentional. Without the tray, the same items look scattered.
Formula 3: The Plant + Cookbook
A small potted herb (basil, rosemary) next to a stack of 2–3 cookbooks. Functional, alive, and personal. Herbs do well in kitchen light and humidity.
Formula 4: The Appliance Edit
Keep only daily-use appliances on the counter (coffee maker, toaster). Store the rest. Each appliance you remove makes the kitchen feel larger and cleaner. Be ruthless — if you use it less than 3x per week, it lives in a cabinet.
Formula 5: The Single Statement
One beautiful object — a ceramic vase, a sculptural fruit bowl, a vintage scale. Negative space around it makes it shine. This minimalist approach works best in modern kitchens.
Small Kitchen Decorating
Small kitchens need smart choices. Every decor decision should serve double duty or create an illusion of space.
Make It Feel Larger
- Light colors: White or light cabinets, light countertops, light backsplash. Dark colors absorb light and shrink the space visually.
- Reflective surfaces: Glossy backsplash tile, glass cabinet doors, or a mirrored backsplash bounce light around.
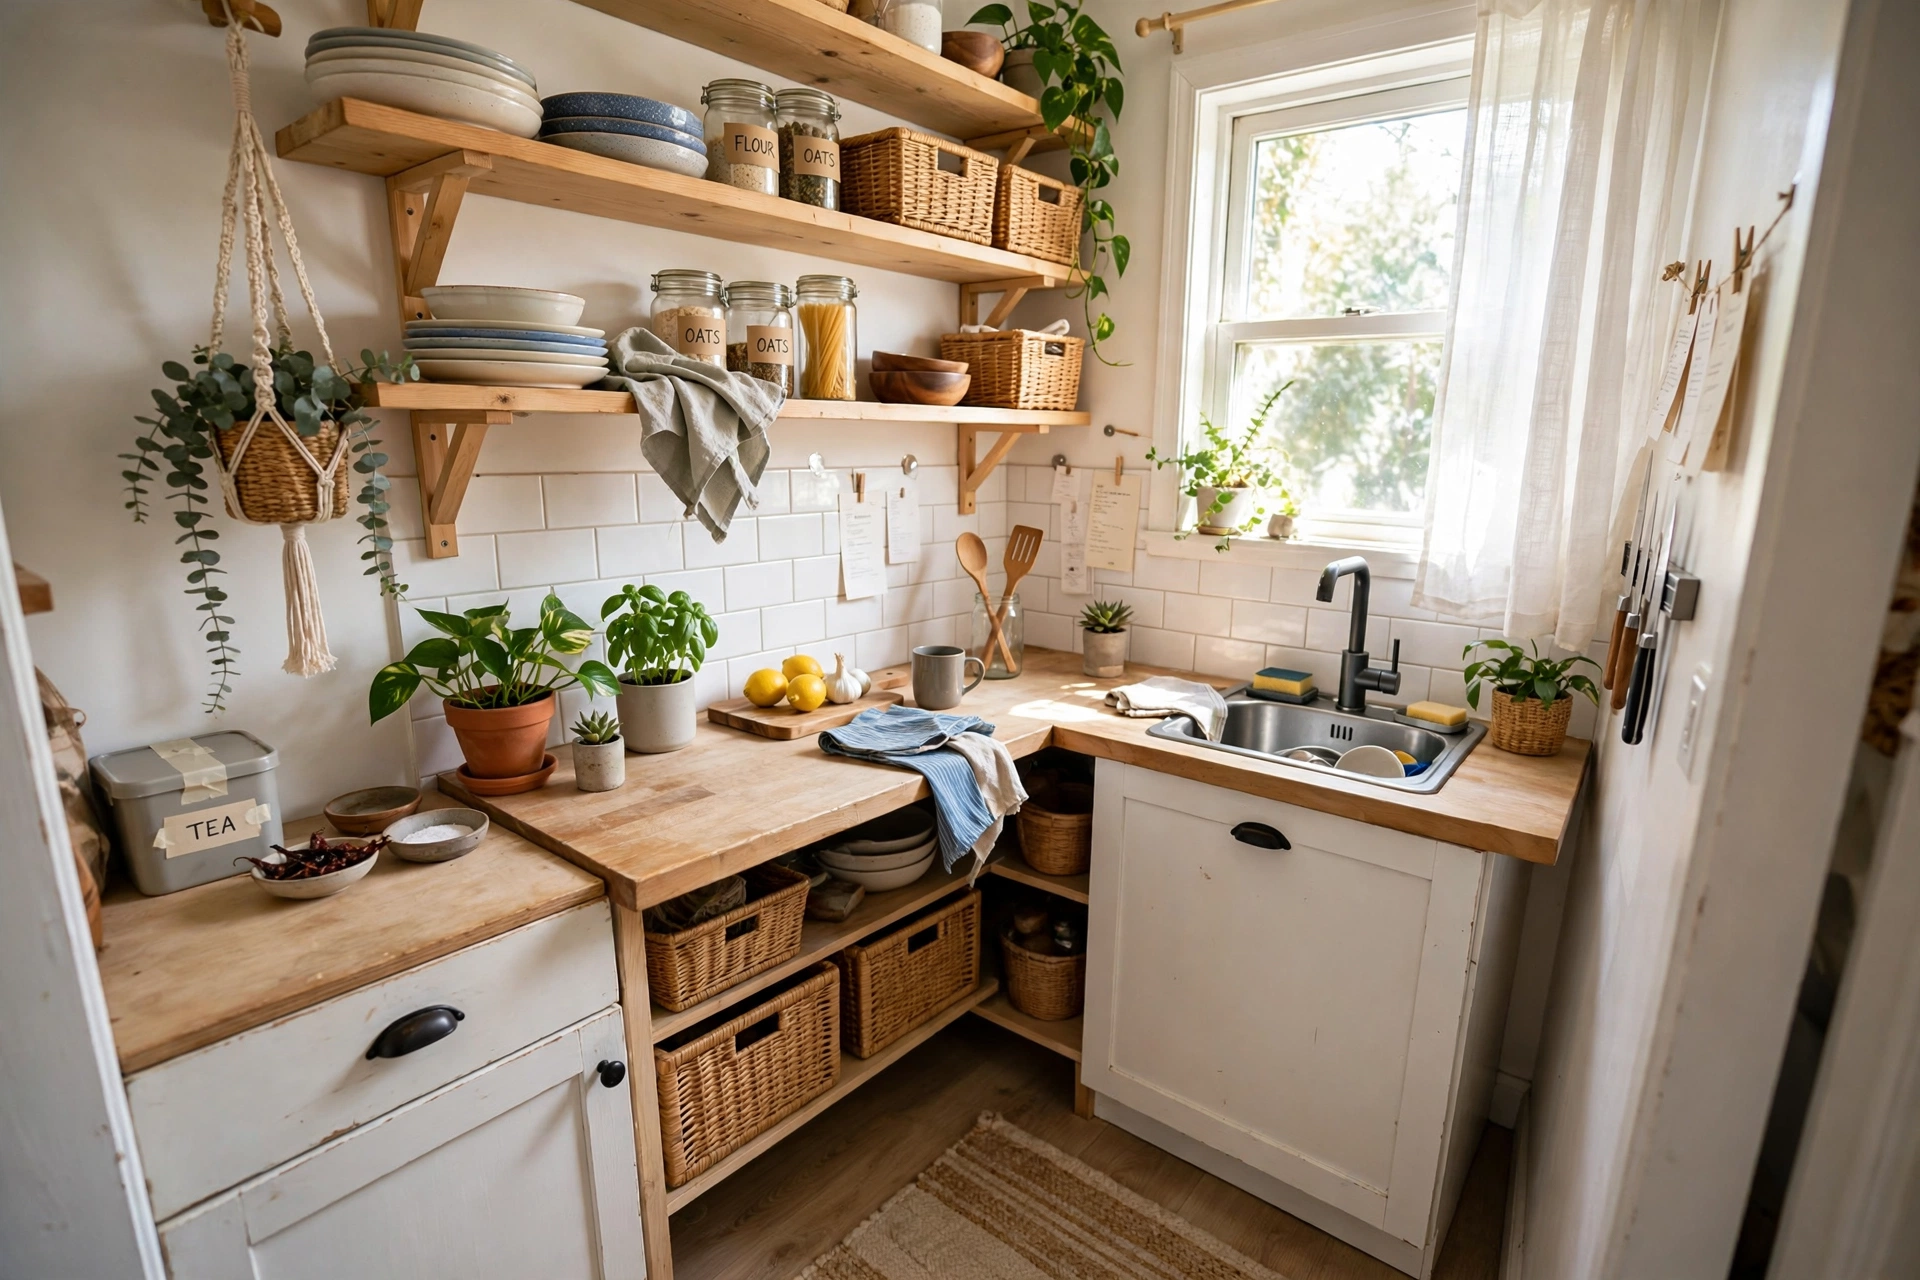
- Open shelving (selectively): Replace one upper cabinet with open shelves. It opens the sightline and provides display space. Don’t do all open shelving — it looks cluttered in small kitchens.
- Under-cabinet lighting: Illuminates the countertop, making the workspace feel larger and more inviting. LED strips are inexpensive and transformative.
Storage That Doubles as Decor
- Magnetic knife strip: Frees drawer space, looks professional, keeps knives accessible.
- Hanging pot rack: Frees cabinet space, adds visual interest. Best with matching cookware.
- Glass canisters: Store dry goods in matching glass jars. Functional and beautiful on open shelves.
- Pegboard: Customizable wall storage for utensils, pots, and small items. Paint it to match your kitchen.
Budget Kitchen Upgrades (Under $500)
Hardware Swap ($50–$150)
Replacing cabinet knobs and pulls is the highest-impact budget upgrade. New hardware modernizes dated cabinets instantly. Measure existing hole spacing before buying.
Peel-and-Stick Backsplash ($50–$200)
Peel-and-stick tile transforms a kitchen in a weekend. Subway tile patterns are timeless. Ensure the wall is clean and smooth before application.
Lighting Upgrade ($100–$300)
Swap dated pendant lights or add under-cabinet LED strips. Good lighting makes even budget kitchens feel high-end. Warm white (2700K–3000K) is most flattering. Related: Pendant Lights vs Recessed Lighting in Kitchens: Which.
Paint ($50–$100)
Painting walls (not cabinets) is the cheapest transformation. A fresh coat in a modern color updates the entire space. If cabinets are the problem, painting them is bigger ($200–$400 DIY) but transformative.
Open Shelving ($50–$150)
Remove one upper cabinet door (or the entire cabinet) and install a wood shelf. Style with dishes and glassware. This single change opens up a kitchen visually.
Kitchen Lighting Guide
Three Layers You Need
- Ambient: Overhead general lighting. Recessed cans or a central fixture. Dimmable is ideal.
- Task: Under-cabinet lights for countertop work. Pendant lights over an island. This is the most important layer for function.
- Accent: In-cabinet lighting (glass-front cabinets), toe-kick lighting, or a statement pendant. Adds depth and mood.
Pendant Light Sizing
For kitchen islands: pendants should be 12 inches narrower than the island width (total). Hang them 30–36 inches above the countertop. Space multiple pendants 24–30 inches apart.
Common mistake: Pendants hung too high (they should feel intimate, not float near the ceiling) or too small for the island (tiny pendants over a large island look lost).
Open Shelves vs. Upper Cabinets
Open shelves pros: Visually opens the kitchen, provides display space, easier access to daily items, less expensive than cabinets.
Open shelves cons: Requires constant curation (clutter shows), collects grease and dust, less storage capacity, not ideal for mismatched dishes.
🛒 Shop This Look:
The compromise: Mix both. Keep upper cabinets on one wall for hidden storage, do open shelves on another for display. Or replace just one cabinet with shelves as an accent.
Styling open shelves: Group by color or material. Stack bowls, line up glasses, lean cutting boards. Leave 20% empty space — packed shelves look cluttered. Repeat items (3 white bowls, 4 clear glasses) look more intentional than one of everything.
What to Put Above Kitchen Cabinets
The space above cabinets collects dust and is hard to reach. If you decorate here, choose items that are easy to clean and look good from below.
Good options: Large-scale art leaned against the wall, a row of matching baskets (hides the gap), or nothing at all (clean and modern).
Avoid: Small knick-knacks (look cluttered from below), fake plants (collect dust, look cheap), anything that requires frequent dusting.
The modern answer: Leave it empty. The trend has shifted away from decorating above cabinets. Clean lines feel more current.
Rental Kitchen Upgrades
Renters can transform kitchens without permanent changes:
- Peel-and-stick backsplash: Removes cleanly. Biggest visual impact.
- New cabinet hardware: Save the originals, reinstall when you move.
- Adhesive under-cabinet lights: Battery-operated LED strips, no wiring.
- Freestanding storage: Rolling cart, over-door organizers, tension rods for extra hanging space.
- Contact paper: Cover dated countertops with marble-look contact paper. Surprisingly convincing.
- Rug runner: Adds color and warmth, protects floors, removes easily.
Decorating by Kitchen Layout: Galley, L-Shaped, and One-Wall
Small kitchens come in three common shapes, and each rewards a different decorating approach.
Galley kitchens (two parallel counters) feel narrow by nature. Keep both sides visually light — open shelving on only one wall, not both, or the corridor closes in. A runner rug down the center adds warmth and makes the space feel intentional rather than tunnel-like. Hang pendant lights in a straight line down the middle; the repetition draws the eye through the space and makes it feel longer. Avoid decorating both walls heavily — in a galley, restraint on one side is what creates the feeling of width.
L-shaped kitchens have a natural corner that collects clutter. Treat the corner as a dedicated zone: a lazy Susan or corner shelf system inside the cabinet, and on the counter above it, one styled vignette (cutting board lean, plant, or tray corral — pick one, not three). The open leg of the L is your sightline into the room — keep it clear and let it breathe. This is the layout where a small island or rolling cart works best, filling the open area without blocking flow.
One-wall kitchens (everything on a single wall, common in studios) live or die by vertical styling. Since you have no perpendicular wall for visual interest, the backsplash becomes your main decorative surface — this is where peel-and-stick tile earns its keep. Use the wall space above the counter fully: a rail system with hooks for utensils, a magnetic knife strip, and one shelf for daily dishes. Everything visible should be beautiful because there is nowhere to hide it.
Common Budget Kitchen Mistakes to Avoid
Decorating before decluttering: No styling formula fixes a counter crowded with appliances, mail, and random gadgets. Do the appliance edit first — every item removed makes the remaining decor look twice as good. Styling a cluttered kitchen is like accessorizing an unmade bed.
Buying decor before measuring: That 36-inch runner is useless in a 30-inch walkway. Measure walkways, shelf depths, and the space between counter and upper cabinets before buying anything. In small kitchens, an inch matters — a tray that overhangs the counter edge by half an inch will annoy you every single day.
Too many small items: Five tiny objects on a counter read as clutter; one medium object reads as decor. This is the most common budget-kitchen mistake because small items are cheap. Consolidate: replace three small plants with one substantial one, replace scattered canisters with a matching set.
Ignoring the ceiling: Small kitchens often have dated flush-mount fixtures that cast unflattering light. A $60–$120 semi-flush or small pendant swap changes the entire feel of the room — it is the highest-impact single change most budget kitchens can make, and it takes twenty minutes with the breaker off.
Choosing style over wipeability: Kitchens are greasy, steamy environments. That beautiful unsealed wood tray will warp; those fabric storage bins will absorb cooking odors. Every decorative item in a kitchen should survive a wipe-down. When choosing between two options, pick the one you can clean. Related: Are White Kitchens Going Out of Style.
A Weekend Project Timeline
If you want to transform a small kitchen in a single weekend, sequence matters. Doing things in the wrong order means redoing work.
Saturday morning — clear and clean: Empty the counters completely. Deep-clean every surface, including the tops of cabinets and the backsplash. You cannot style on top of grime, and the empty counter will show you what the space actually looks like.
🛒 Shop This Look:
Saturday afternoon — install: Mount the peel-and-stick backsplash, install under-cabinet LED strips, hang the pendant or swap the ceiling fixture, mount shelves or the pot rail. All the dusty, drilled, adhesive work happens in one block while the counters are clear.
Sunday morning — hardware and paint touch-ups: Swap cabinet hardware, touch up wall paint, install the magnetic knife strip. Small-detail work that is satisfying but should not compete with the big installs for energy.
Sunday afternoon — style: Only now do the countertop formulas, shelf styling, and rug placement. Styling last means every decision is made with the finished room in front of you, not imagined. Live with it for a week before buying anything else — the urge to add more usually fades once the dust settles.
Keeping a Budget Kitchen Looking Good
Budget finishes need slightly more maintenance than premium ones. A little routine care keeps them looking intentional for years.
Peel-and-stick backsplash: Wipe with a damp cloth and mild dish soap; avoid abrasive scrubbers that lift edges. Re-press any lifting corners with a hair dryer on low heat — the warmth reactivates the adhesive. Expect 3–5 years of good life in a normal kitchen; plan on replacement, not permanence.
Painted walls and cabinets: Keep a small jar of touch-up paint. Kitchen walls collect grease film — a yearly wipe-down with a degreasing cleaner (diluted dish soap works) keeps paint looking fresh. Touch up chips around handles promptly; small chips become peeling edges if ignored.
Open shelving: The grease-and-dust reality means open shelves need wiping every 2–4 weeks, not seasonally. Keep a microfiber cloth in the nearest drawer so it takes thirty seconds. Dishes you use daily stay clean on their own; decorative items on the shelf need the wipe-down.
Contact-paper countertops: Use cutting boards religiously — knives cut through contact paper instantly. Wipe spills promptly, especially around the sink where water seeps under edges. Heat is the enemy: always use trivets, since a hot pan will bubble the adhesive.
Frequently Asked Questions
How do I make my kitchen look expensive on a budget?
Focus on three things: lighting (under-cabinet LEDs), hardware (modern pulls), and decluttering (clear counters). These three changes cost under $300 total and make any kitchen feel high-end. Expensive kitchens aren’t about costly materials — they’re about intentional details and lack of clutter.
What color should I paint my small kitchen?
White or very light neutrals. They reflect light and make the space feel larger. If you want color, use it on a single accent wall or the island, not all walls. Dark colors in small kitchens feel oppressive unless there’s abundant natural light.
Are open shelves practical?
For daily-use items, yes. For rarely-used items, they collect dust and grease. The practical approach: open shelves for the 10–15 items you use constantly, closed cabinets for everything else.
What is the best flooring for a small budget kitchen?
Peel-and-stick vinyl tile or luxury vinyl plank (LVP) over the existing floor. Both install without removing old flooring, cost a fraction of tile, and handle kitchen moisture well. Choose light tones to keep the small space feeling open, and run planks parallel to the longest wall to stretch the room visually. Avoid dark flooring in small kitchens — it shrinks the space and shows every crumb.
How do I add personality to a rental kitchen I cannot change?
Focus on what you can take with you: a beautiful rug runner, art leaned on the counter or hung with damage-free strips, a statement pendant on a plug-in swag cord (no wiring needed), open shelving styled with your own dishes, and plants. These five elements transform a generic rental kitchen completely, and every one of them moves with you. Save the peel-and-stick and hardware swaps for rentals where you have written permission — they are removable, but not every landlord agrees.
By Ella Knight
🛒 Shop This Look:
- Kitchen Ideas — our complete hub
- Kitchen Countertop Decor
- Kitchen Rugs and Runners




1 thought on “Kitchen Decor Ideas on a Budget for Small Kitchens (2026)”
Comments are closed.